


demo243
-
Posts
1,501 -
Joined
-
Last visited
-
Days Won
2
Content Type
Profiles
Forums
Events
Store
Classifieds
Posts posted by demo243
-
-
So it’s happening!

I had plans to do some other stuff before swapping the carbs but I got motivated today and started tearing stuff apart.
Ultimately this was a good thing… I am amazed this car hasn’t burned to the ground!!!!
Started to pull the fuel lines from the fuel rail and barely touched the fuel line under the front carb and it essentially disintegrated in my hands dumping gas on the drive way…. My guess is it was replaced with a non fuel safe hose at some point


Anyway here’s a teaser shot!
Need to do some grinding/trimming of the manifold and header up front as there is some interference… and need to drop the center section of the exhaust and run it down to the exhaust shop for a O2 bung. Also need to trim or re-bend the heatshield- just catching the header under the manifold. But could potentially have it back together tomorrow. We’ll see…-
 3
3
-
-
Still got her- still pulling double duty as a shelf….. I did get her out a few time last year and hopefully more this year. Z has just snowballed and snowballed… but it’s getting close. Then the 510 is back in line.
Probably going to actually have to do something about the garage next year so that will make it easier to drive either one at will….

-
2
-
-
12 hours ago, datsunfreak said:
Are you still running the stock feed line? If so, it may also be rusty on the inside? But both of those filters are definitely full of rusty sediment.
If your rear filter is horizontal, but the front is vertical, that could also be part of the issue. Horizontal filters are harder to stop up with sediment than vertical ones. But the rusty bits should not have mae it past the first filter to get to the second one, unless the tubing is also rusty.
Yes, it should stall. Yours would be the first I've seen where "enough" fuel gets through to keep it moving. Usually they stall out, then after they sit for a minute and the sediment falls out of the filter media, it will start back up and drive again.
Still on the stock lines- and yea based on the front filter - the lines are likely a bit rusty too…
maybe there is something in one of the carbs that is clogging one of them up.
i guess I’ll add fuel lines and a tank to the list for this car…
-
21 minutes ago, datsunfreak said:
This definitely sounds like trash in the fuel system. Especially after looking at that fuel filter...
The tank will definitely need dealing with. I will probably just order one of the S30world tanks- I’m too deep $$$ wise in this car already so might as well keep going.
My only thought is- the fuel filter (at least up front) was still full of fuel. I guess if the blockage was at the pick up then the pump wouldn’t have anything to push so the system would “stall” - but wouldn’t the car die then? The car still runs and will “move” under its own power… just with a severe lack of power… I don’t have a pressure gauge on this system right now and it’s a hard problem to diagnose since it’s so infrequent…
-

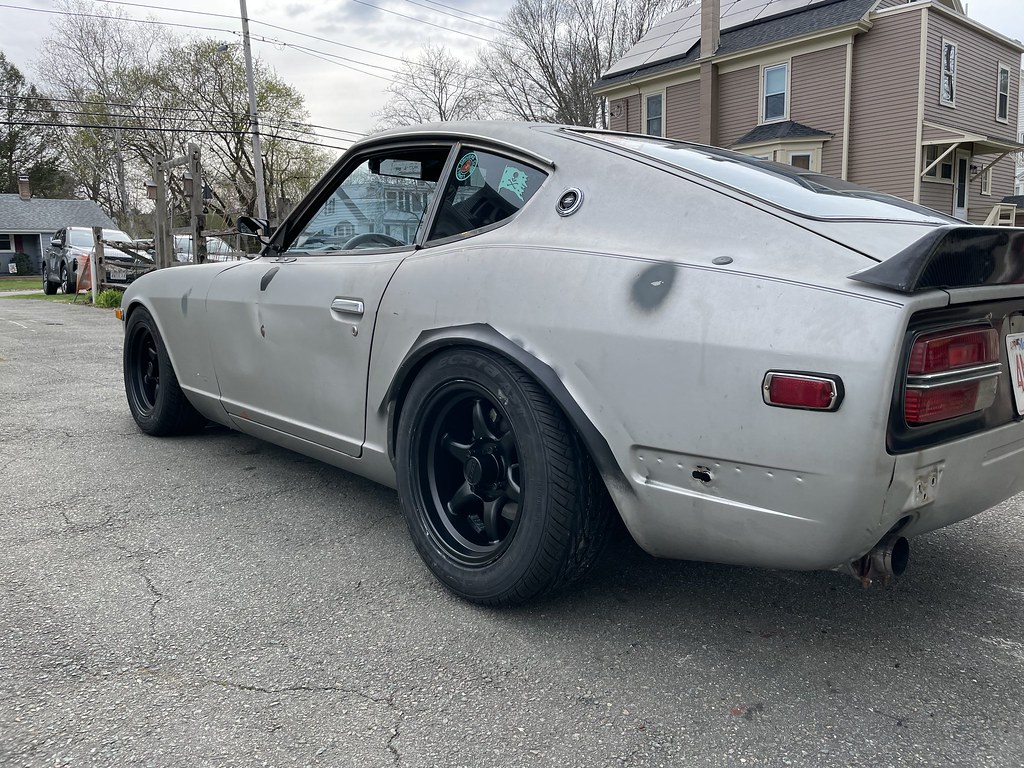
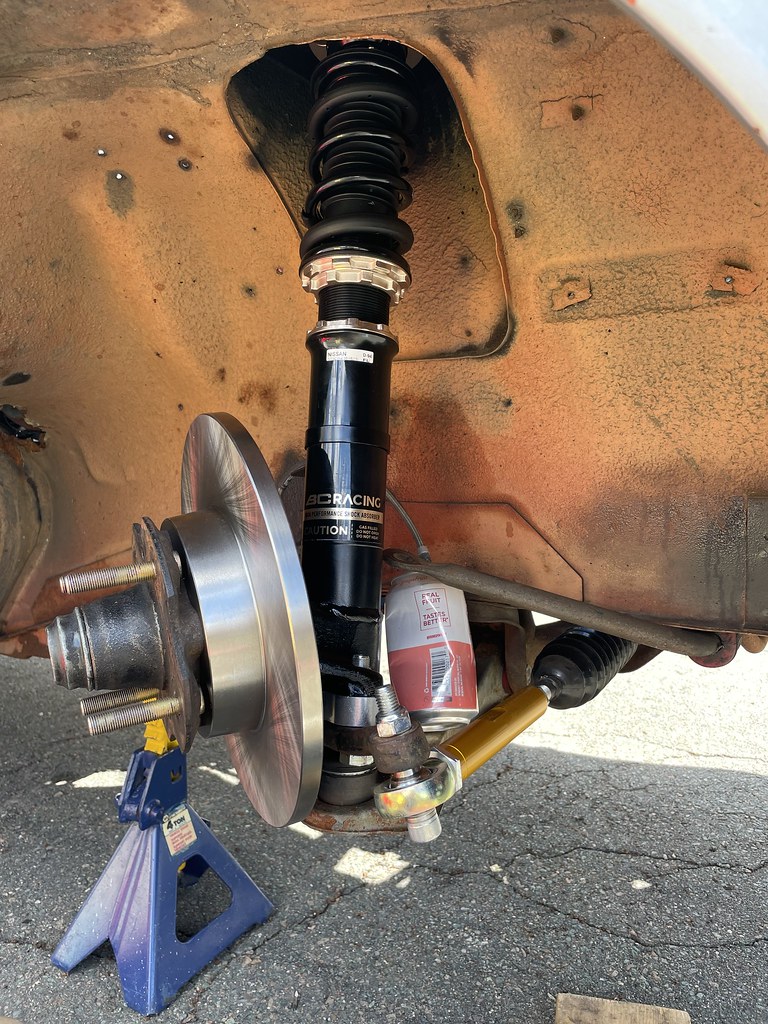
Another tape measure alignment and we have a couple more drives in with the car- including a few highway rips. Really happy with the BCs- running 5k/5k springs and it’s firm but supple. Car handles so much better lower and stiffer. Haven’t really thrown it around but don’t think I’ll need a rear sway either. Also seems like the rears clear the fenders. Still want to roll them at some point though to pull some camber out.
Definitely have a dirty tank though… two fresh filters….


Also ran into my “stumble” loss of power issue again this morning. This time just cruising around… just all of a sudden loses power, feels like it’s only running on a couple cylinders- Afrs spike super lean. Will stay running if you really force it too with the throttle… stopped it parked, fired it back up and was fine… Not the fuel pump since that was replaced- maybe a clogged line or input from the tank? Would make sense since it clears and goes away? I think it’s fuel since the engine is still running… but I also think it’s carbs because of that ( very similar to my last experience with a starved carb- Weber with stuck needle valve)… hmmm
On a cooler note- was digging through some of the stuff that came with the car and found the original window sticker! Lots of other receipts and stuff to go through still.

Also the kid takes some cool photos sometimes

-
3
-
-
And…
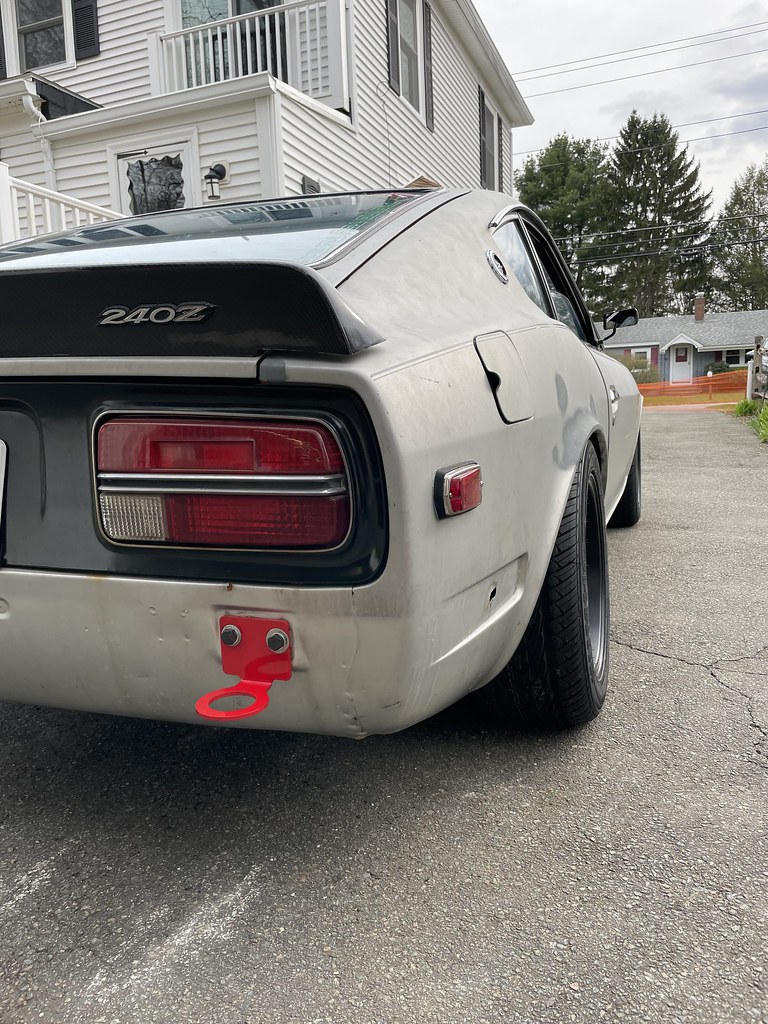
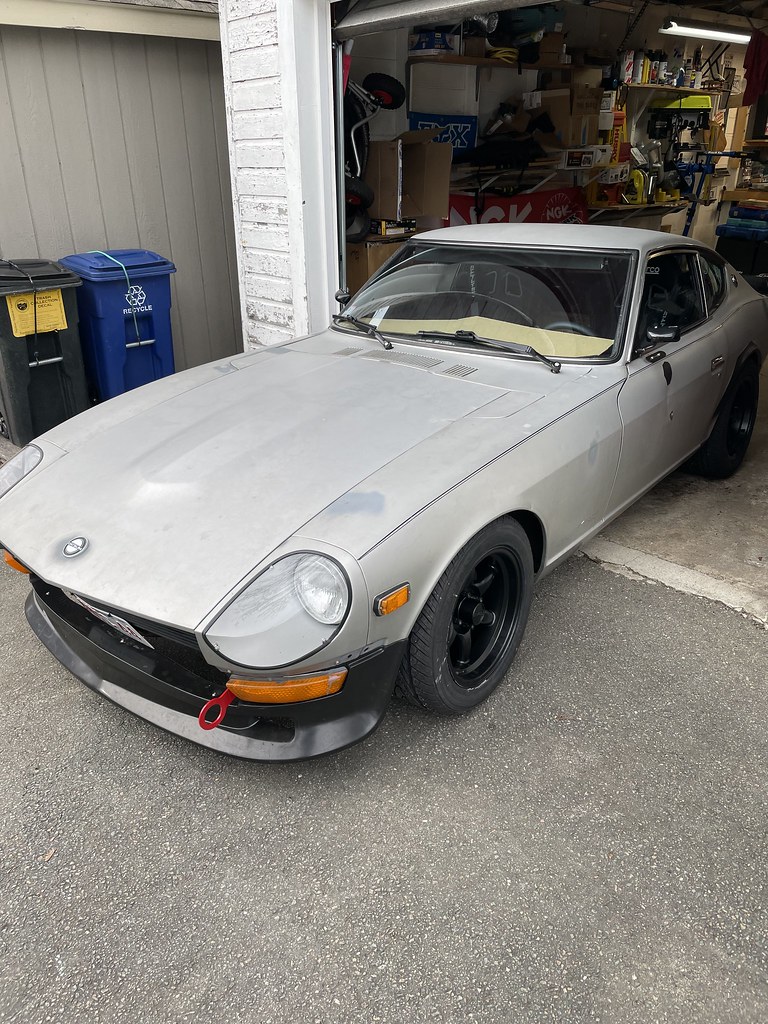
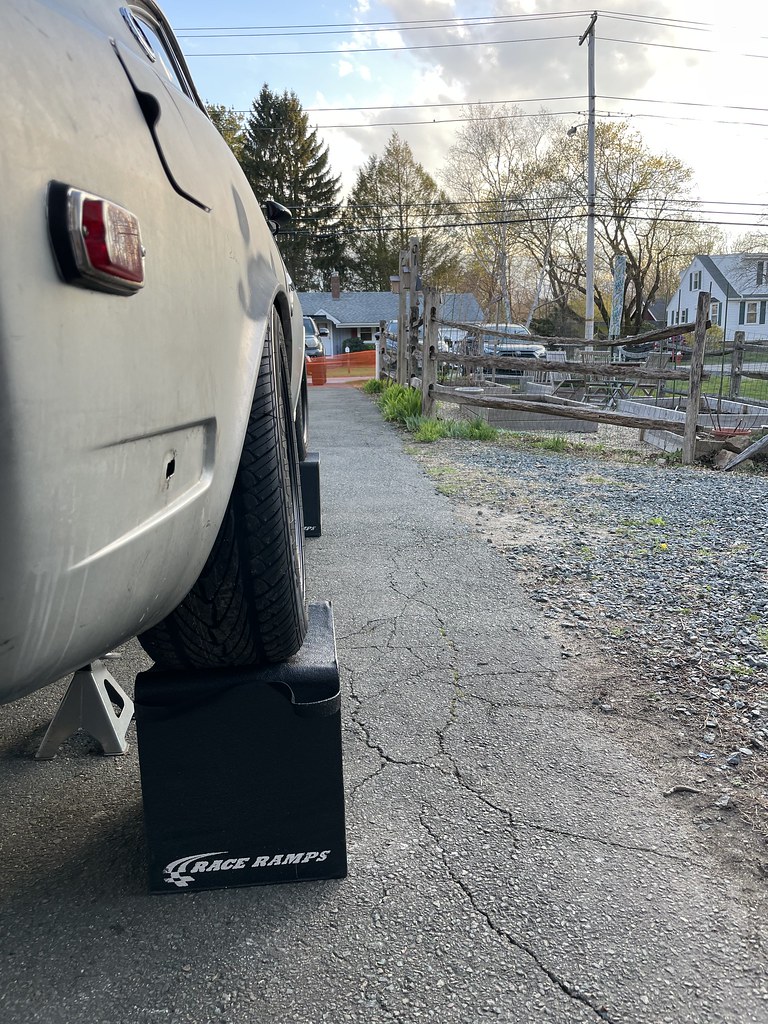
We are back on the ground!!!!
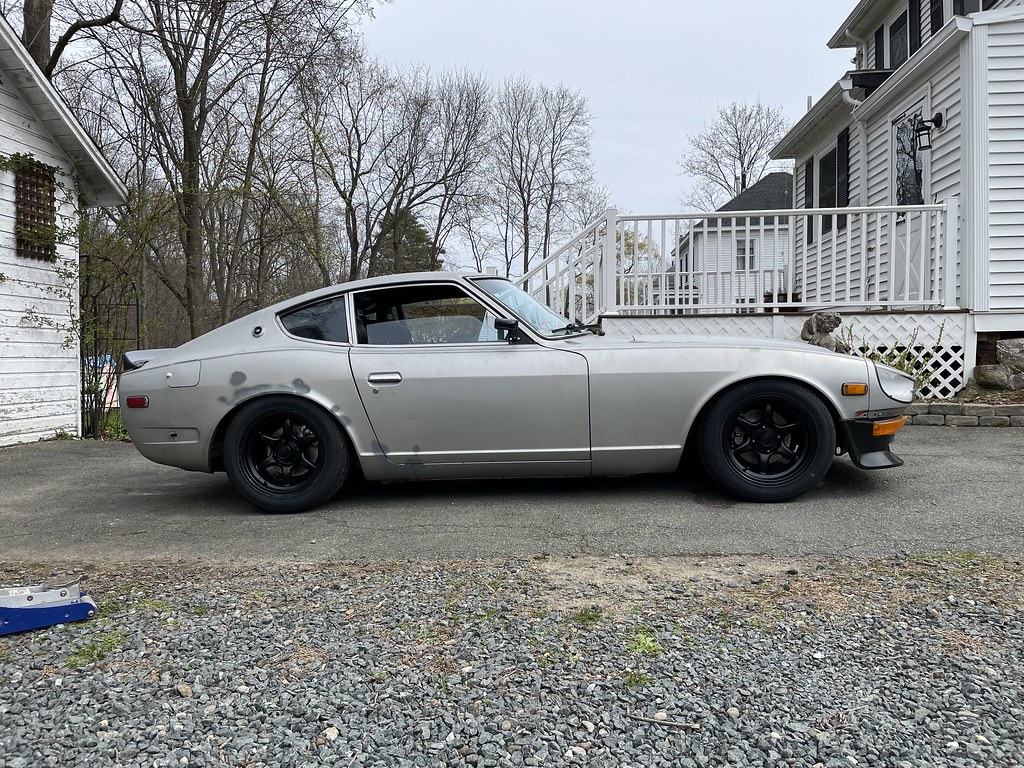
Looks so good!!
Before we got there though I tried to roll the rear fenders…. With no luck! Broke the fender roller- stripped the nut and all the fender did was cut into the roller… even tried the old book method… but the car isn’t heavy enough!
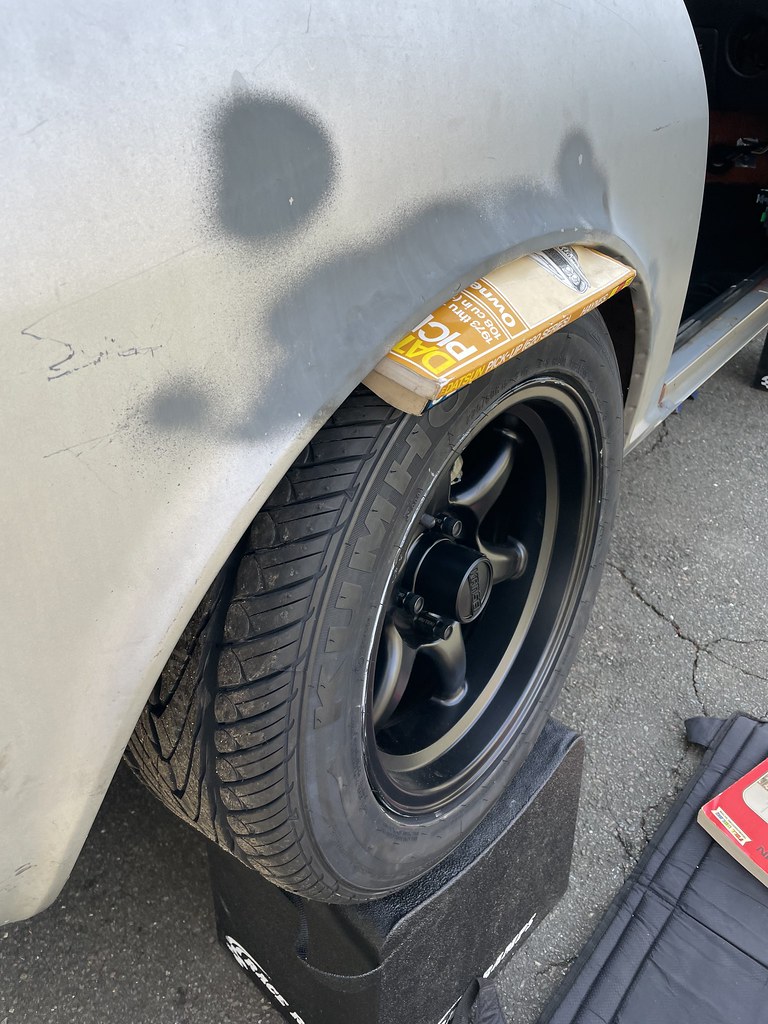
Gave up on that - although I may not need to worry about it. Seems like as long as I have the camber dumped it might be ok.
Then I added a spacer and adjusted the e brake cable as tight as it would go. Works well enough to torque the lugs… but idk about MA state inspection… ghetto but will do for now.

Then bleed the brakes- quick bleeders for the win!!! Make life so much easier.
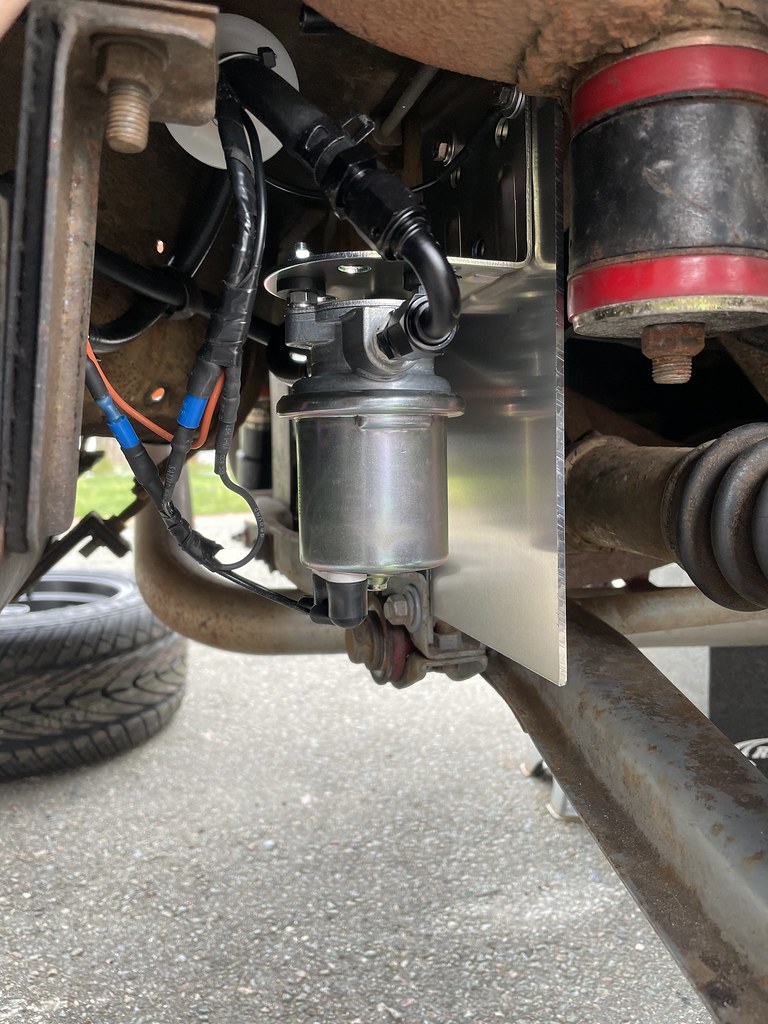
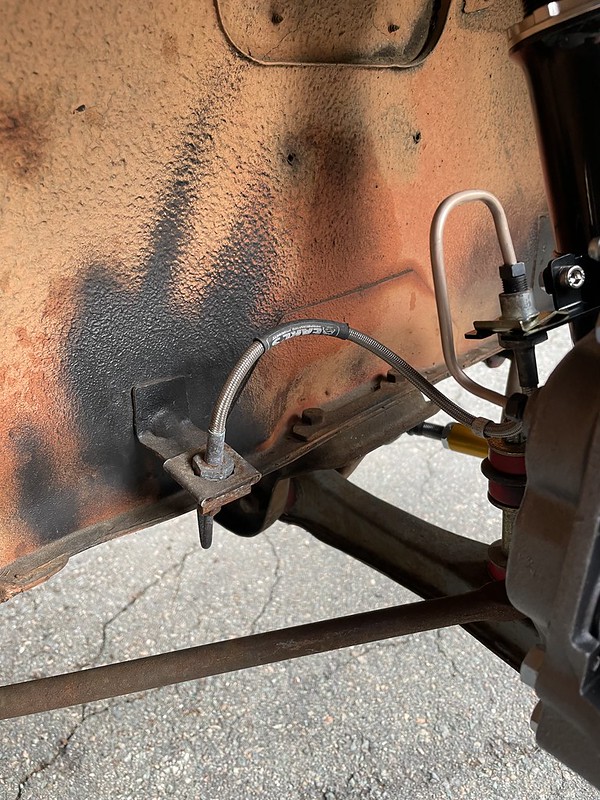
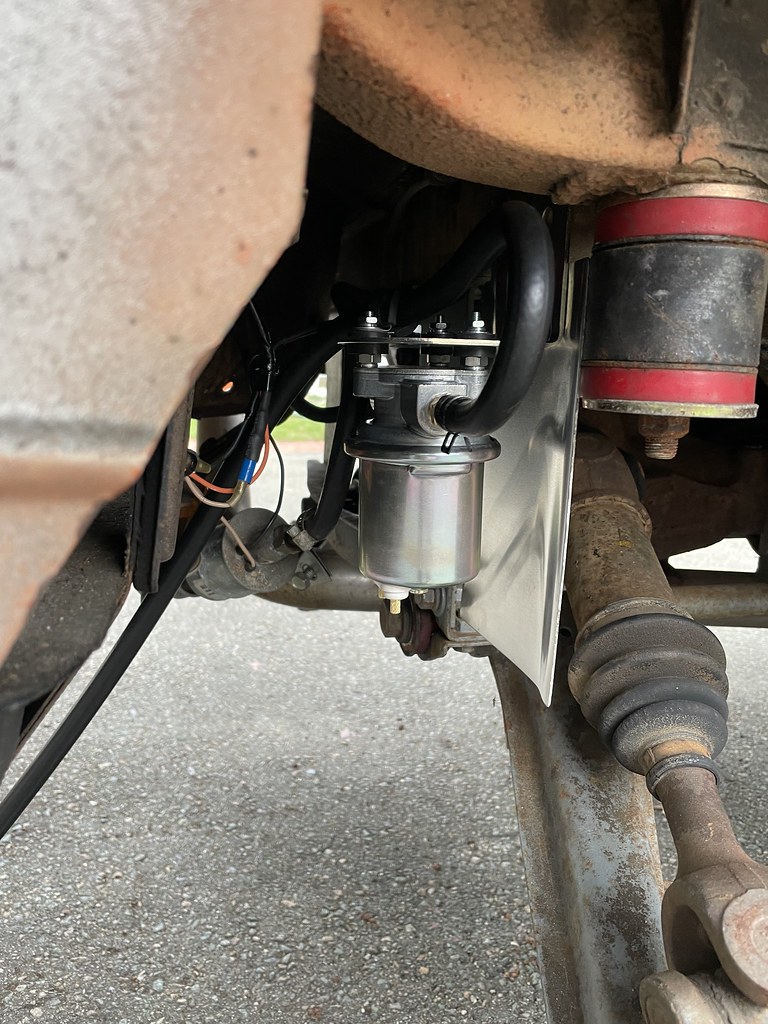
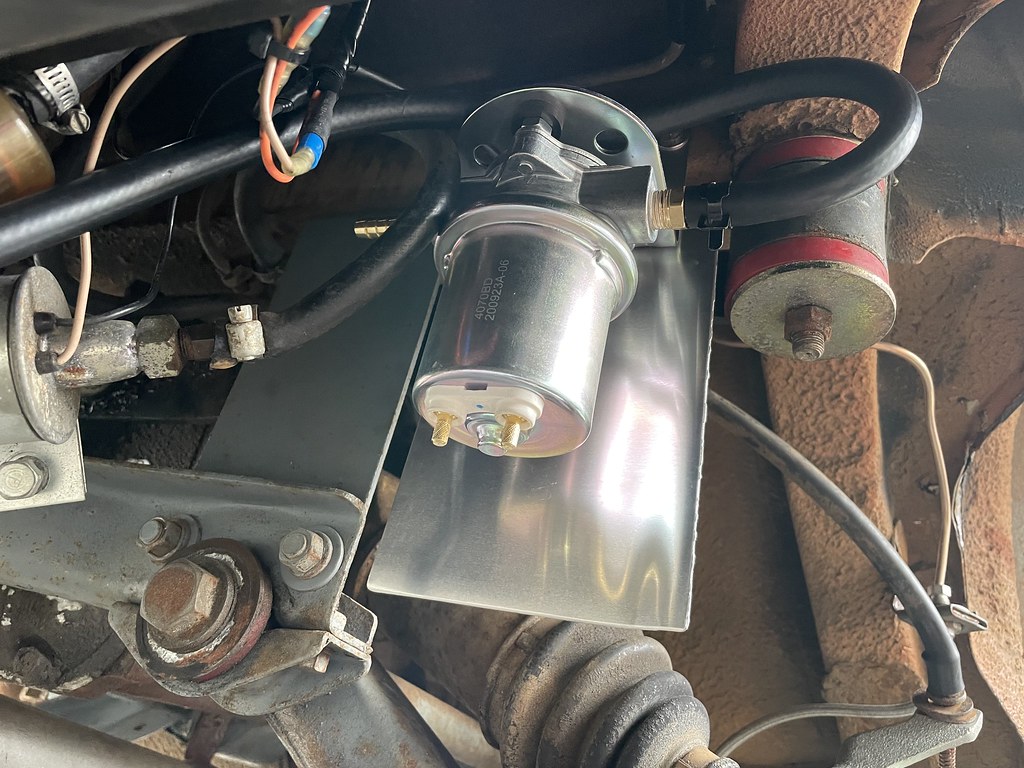
Finally while it was in the air I re-made the fuel pump shield with some 1/8” aluminum. It is sandwiched between the pump mount and the body using the Nissan mounts.
After that I primed the pump and fixed one fuel leak at the front carb.
Then I dumped it on the ground!
It went back up for a quick driveway alignment (definitely needs a pro… - tape measure was catching on the oil pan so not really accurate… and likely (definitely) have more front camber then needed).It is LOW! Exhaust flange is 1/2” off the ground!

Too low I guess… didn’t make out the driveway without scraping…

Back up it went! Added 1/2” to the coilovers and made it out the driveway.
Dumped camber-

Cleaned up and tried to push it back into the garage for the night….Beached!
Got it a little further back till the flange hit… then was stuck…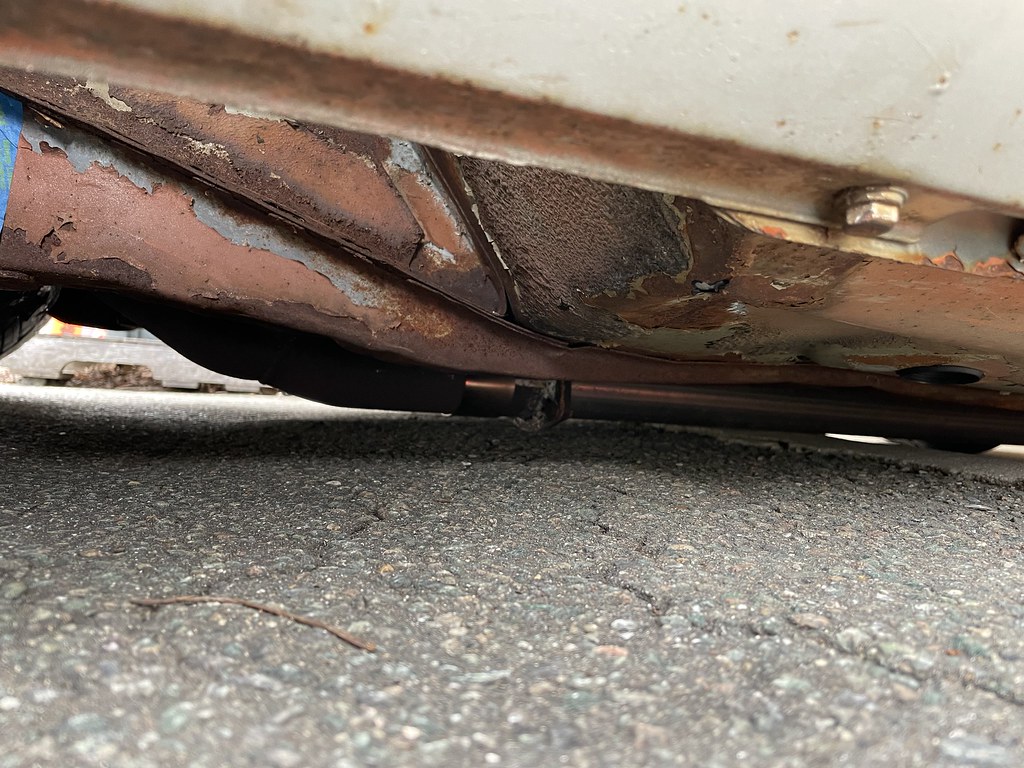
Really need to tuck this exhaust… lots of room back by the crossmember- it’s a couple inches off of the cutout for the exhaust… but this is the header flange that is the issue… and more frustratingly is I have the same header as a replacement! Hopefully the exhaust shop can help… Thinking some new engine and trans mounts might help a touch to lift the the engine up a touch - need to look into it.
couple of 2x4s should get it in the garage tomorrow hopefully
-
2
-
-
Wasted a bunch more time today on the rear brakes- but I think I have them sorted out. I’m not stoked on them but hopefully it works out. Bleed and e brake adjust tomorrow and we’ll find out.
First I swapped the caliper back to there “proper” (left on left/ right on right sides) as I had set the brake lines up for and jacked up the control arm- short answer was that wasn’t going to work-
So I ended up swapping them back to the opposite sides as recommended for the swap (also puts the bleeders up top) and then had some fun with a drill and the angle grinder.
it puts a pretty sharp bend on the e brake cable but still seems to work- hopefully I can tighten it enough to work.Long story short is I should have just bought the damn Wilwoods… anyway hopefully I get a year or two out of this set up and call it good enough. That’s what I get for trying to cheap out here…
Also definitely gonna have to roll the rears- tried the fender roller I have but the angle wasn’t working and the metal is pretty thick… guess I’m gonna have to go old school and try the phone book technique.
till then I dumped the camber plates negative

-
1
-
-
The car is back on its wheels… not the ground yet… and not with out issue…

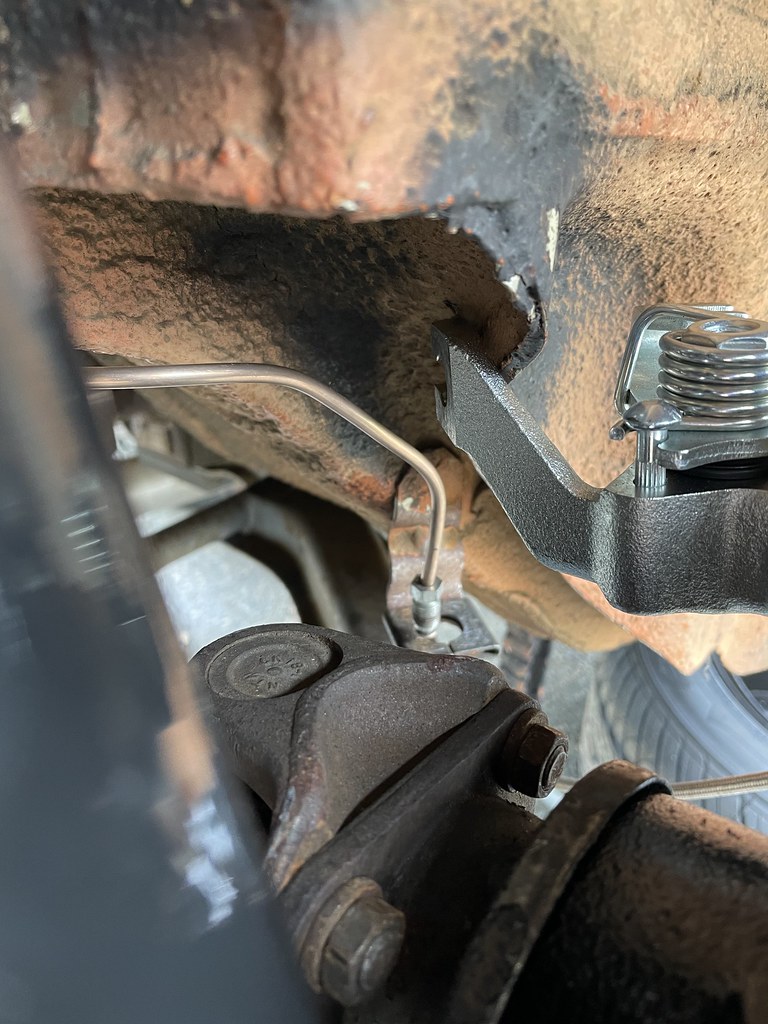
I knew the rear brakes were likely going to be an issue, but at stock height and full droop my rework was no problem and looked like it would clear. How ever… even at full droop with the coil overs there is contact. Like I said based on witness marks from before this was potentially going to be an issue…Here it is with my reroute - there was going to be an issue with the brake bracket. I thought I took another photo but I guess not.
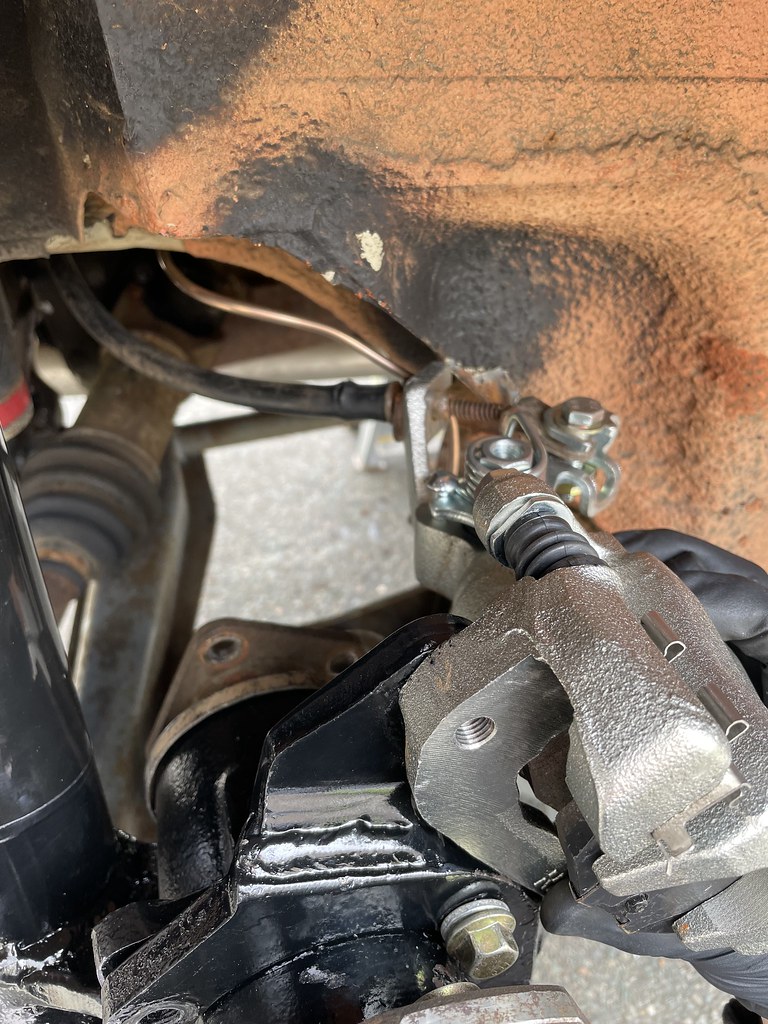
Then I swapped the calipers back to how they were (how it is recommended for a 280zx set up) and still there are issues-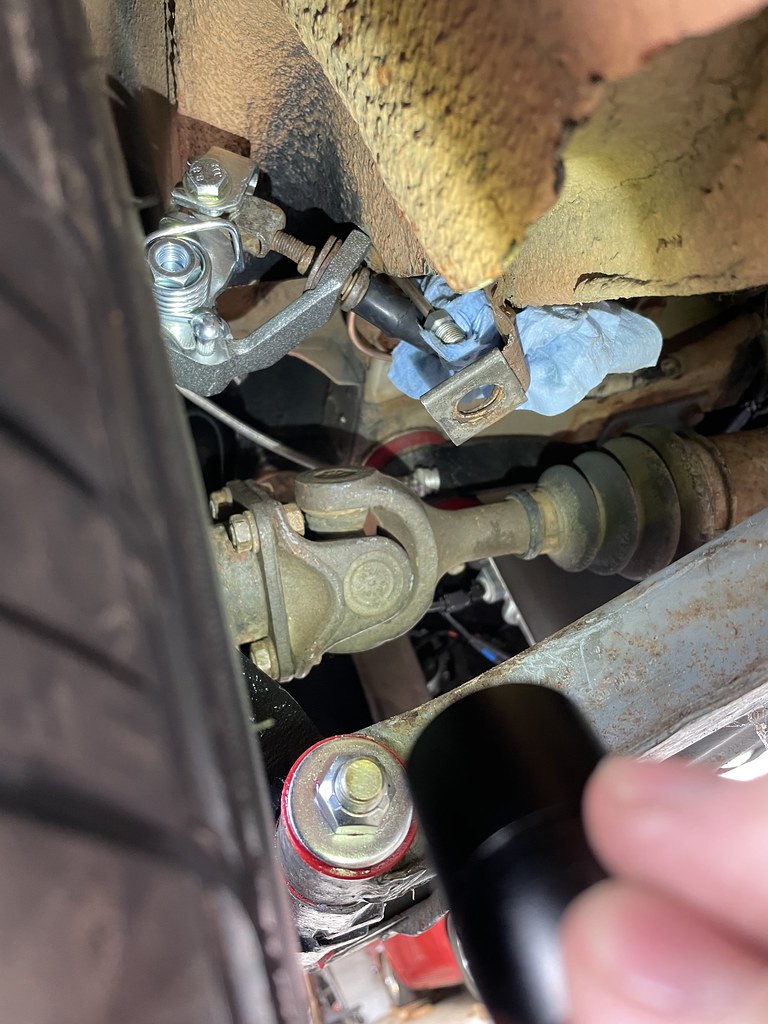
I was thinking I’ll just try and shave the bracket, but looks like the cable will be the next issue….I think I’m going to try and go back in tomorrow and swap the calipers again… another option is to potentially re drill the cable hole lower on the bracket and trim down.
I think most people run a Maxima bracket - and mine is definitely not that as it is welded. I looks like the maxima brackets mount the caliper more vertical which could potentially help- but no way am I gonna find those brackets.
Just frustrated… was hoping to get a couple more years out of these brakes and avoid and expensive wilwood update.
-
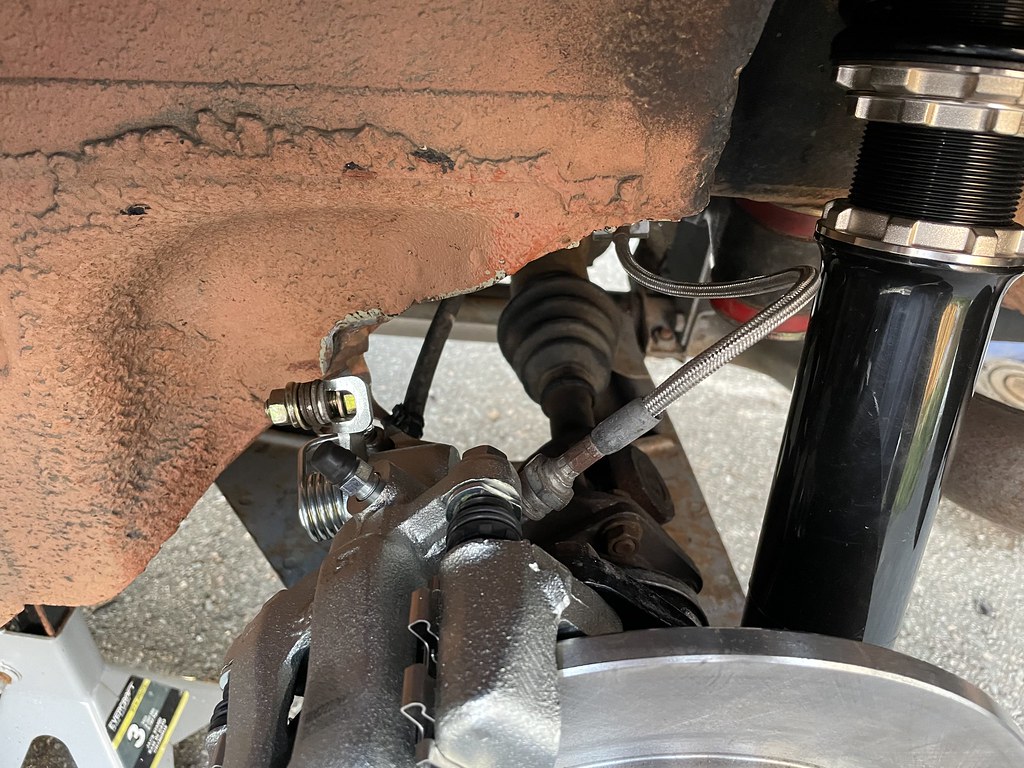
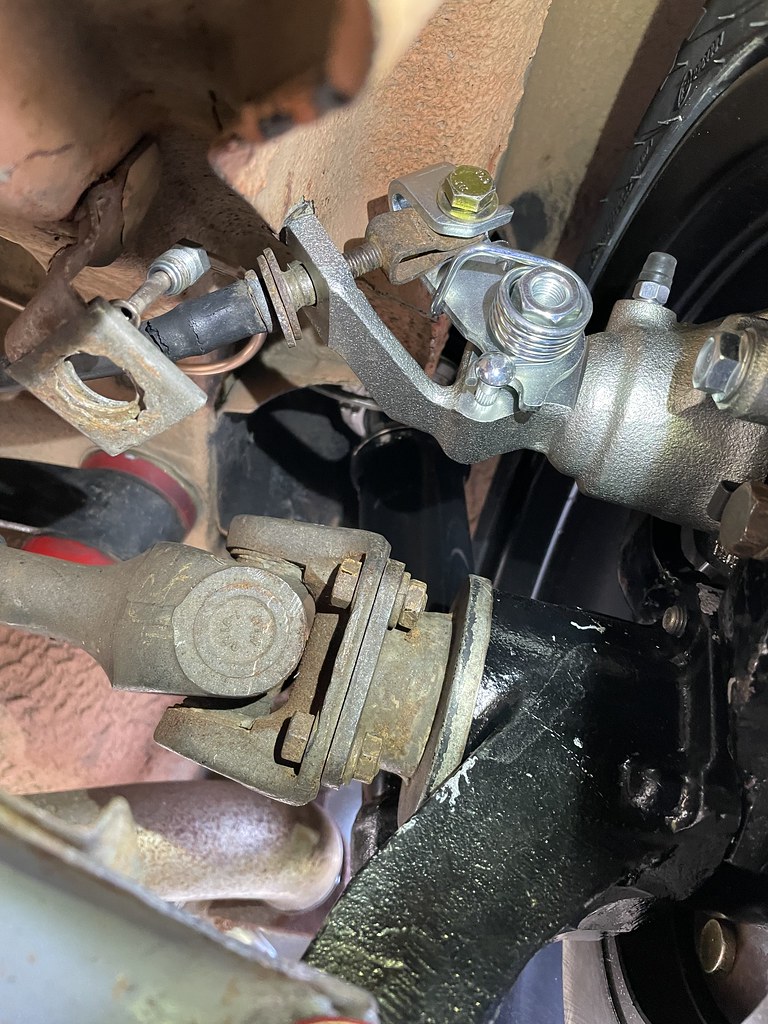
Proper 240z rotors showed up today and fixed the problem. Calipers dropper right on. Got both hubs off and rotors swapped - no big deal, just annoying to have to do it again.
Once the calipers were mounted I got to work on the brake lines - the Toyota calipers (at least on my car) need a short hardline section from the caliper to the strut. The BCs come with a bracket but it is slightly different then the stock 240z one (I believe... don't exactly remember). This car also has stainless flex lines on it already... although they seem slightly short... anyway here is what I came up with. I felt the flex line coming up from the bottom gave it the most length and chance to stretch as the car compresses down ( lengthening the line). Started working on the other side, but bent the line without moving the brake nut so I need to start over.
Picking up some speed bleeders tomorrow. Will hopefully get a chance to get the other front line made and get the rears mounted up tomorrow. Then its time to bleed the brakes.
After that I just need to adjust the parking brake, adjust the exhaust hanger, hopefully try and roll the fenders (may need to customize my roller... otherwise need to extend the coilovers...); and finally a quick driveway front end alignment. I will likely schedule a professional alignment just to check my work and confirm camber specs but tbd...
Hopefully driving it this weekend. 🤞
-
2
-
-
Flex hone showed up today so I got to work this afternoon. Spent about an hr messing around with it. The one strut the spindle dropped right in (same one that came out easy) the other one literally took an hr with the hone… ended up hitting the axles with 400 sand paper quick too to clean em up… so there goes the zinc coating… hopefully these come out again someday…. I pumped em full of grease so hoping for the best. But the rears are in! I did strip out one of the lock pins so need to call Nissan tomorrow and see if they can get me one or I’ll order it from z car depot.
if anyone is dealing with the spindle pins and comes across this- get 2 flex hones; one rough and one fine grit; that should help make it a bit quicker.
New rotors here tomorrow hopefully. Pick up some quick bleeders tomorrow too.
Making progress . Sorry no photos.
Ar least now I can get the car back on wheels and roll it around if I need it too.
More to come- hoping to be driving it this weekend.
-
2
-
-
5 hours ago, datsunfreak said:
That's kooky. I never knew they changed the rotors mid-stream.
All of the guys I know who have done this swap use custom spacers to make the rotor fit. So with the "correct" 240Z rotors, they fit straight on? Or are you not using the regular Toyota truck caliper?
A couple things-
As far as I can tell the 240z all had the same rotors, hubs, strut housings. The 260 is the bastard child, early ones are basically a ‘73 240, late ones are basically a ‘75 280, middle ones are a crap shoot. 280z changed the hubs, struts and rear stubs to beef them up a bit.
There are also 3 different calipers- solid rotors, and 2 different vented rotor versions. As far as i understand the solid rotor version (pre ‘83 4x4 pickup) are a bolt on for the 240z - uses stock 240z and rotors. One may need a spacer on the 280z? Idk. The vented rotor calipers use 300zx rotors and a spacer which varies per caliper.
Im using the regular 4x4 solid rotor calipers. It’s what the car came with and will be good enough for now and maybe long term too. No real plans to track the car so I doubt I’ll run out of brakes … but may want some fancy wilwoods or something someday just because.
-
2
-
-
… continued.
Then came an annoying set back.
Last thing I did was try and mount up the front calipers… and they didn’t fit…

Grabbed one of the old rotors quick and well shit….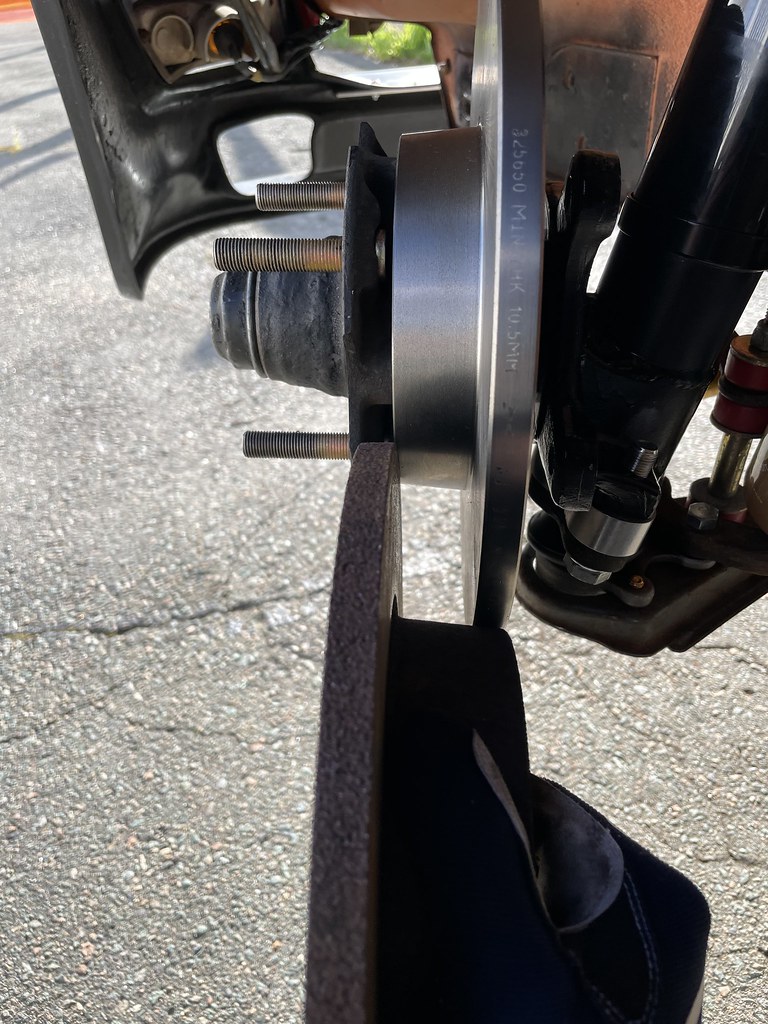
A quick Google and my suspicions seem correct Rock auto sent me 280z rotors. Which are 1.7” in height where as 240z are 2” in height.
A quick run back to RockAuto and they do have the rotors I ordered under the ‘73 240z - although there is a note that says from 8/73 (which shouldn’t matter… since Datsun didn’t change the struts till the late 260 into 280z) - but they do have them listed as 1.7” tall. Also my car is. 8/73 car so it’s wrong on their site either way.
I ordered up the proper replacements which should be here Wednesday hopefully… just annoyed I need to pull the hubs off again. Also annoyed as I’ll need to call and complain since I’m past the 30 day return window…
-
1
-
-
Got some more time out there again today.
Got the rears torqued past the 159ft lbs my torque wrench goes to and called that close enough to the 180ft lbs called for and peened the nuts. Axles spin smoothly and I don’t feel any play.
Then got the fronts installed. I used MSAs short bumpsteer spacer (3/4” instead of 1”)- and glad I did! Plenty of clearance- although I do wish T3 had sent the button heads instead of socket caps.

Then i attempted the rears- but unfortunately the spindle pin was binding on the drivers side. Ordered a 5/8” hone to hopefully clean up the strut and solve that issue. If that doesnt work I’ll try a 5/8 bolt from fastenal- some people have mentioned since its a hair smaller it is easier.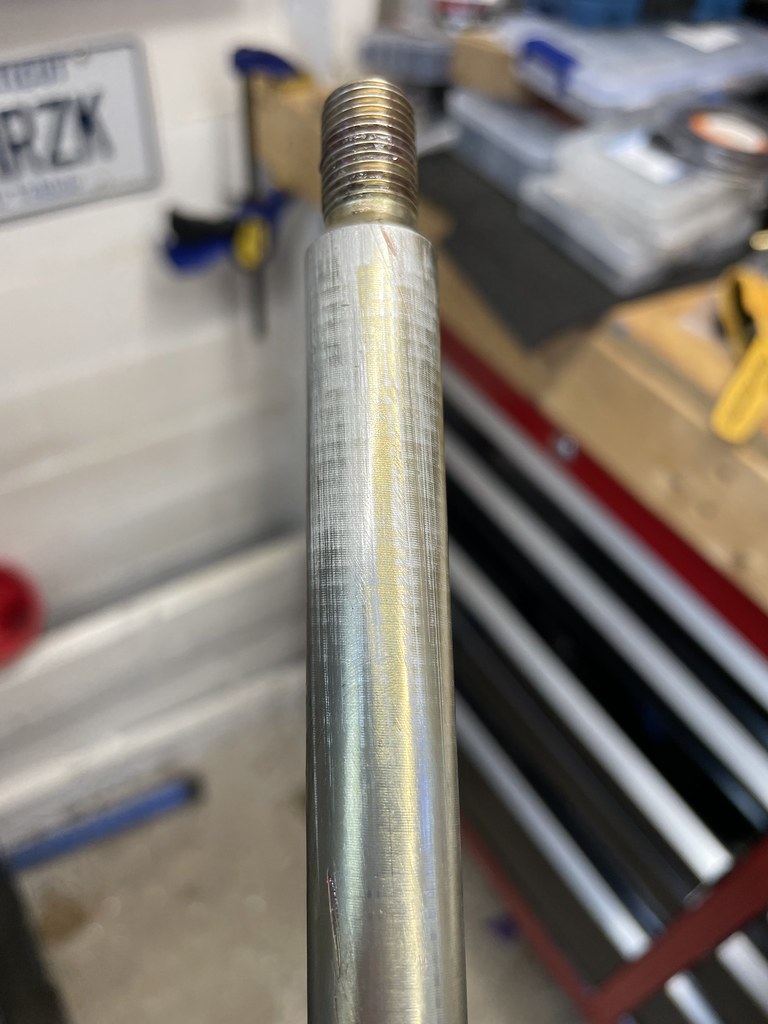
Luckily right as I gave up on that the Amazon guy dropped off my fuel fittings so I refocused on the fuel pump. It is now mounted, plumbed, and wires. Oddly I did the return soft line as well and it is 1/4 hard line but 5/16 on the tank… used a 5/16 hose with a double clamp on the hard line. May get some 1/4” inch to stretch it later on …. Also ordered some thicker aluminum to make another plate for protection out of, but this will do for now.
-
5 hours ago, datsunfreak said:
FWIW, every time I have tried to use a press to install them, they go in a wee bit crooked. I have had good success with using a stack of washers and a normal nut on the stud, then pull them in with an impact gun.
It usually takes more than one nut per car, as sometimes it can bend the threads on a normal nut. 😋
Never has damaged the threads on the stud, though. But we are using ARP wheel studs that are pretty dang stout.
I have actually read that too… anyway seems to have worked fine. I “sacrificed” one of the spare muteki lugs which has a pretty good extended thread which I’m sure helped (lug still threads on smooth… but not sure I would trust it after it’s improper usage. I’ve got 7 more spare so not worried about it.
-
1
-
-
12 hours ago, sick620 said:
I really wish I had an actual progress update to share; this thread has been pretty lackluster so far. For the past year, I've been living in an apartment, solely focused on work and getting my finances in order for a home purchase. Finally, we're closing on a house and moving in a couple of months! I'm thrilled to finally have my very own garage to work on my Datsun. I plan on installing a lift and really diving into this project over the summer and winter!
However, I've had a bit of a change of heart regarding this project. While my initial plan was to do extensive bodywork and paint the car a nice color, and maybe even install something like a Honda K24 motor, I've come to realize that this car, being a stripped-down basket case, is already too big of a project for me to tackle anytime soon. I just want to enjoy working on it without it becoming a never-ending project that I keep putting off until I have more time or money.
After looking at countless 510s on Google images and project threads, I've realized that my preference leans more towards "ratsun" cars with a bit of patina or a flatter, more aged-looking paint. In an ideal world, my dream 510 would have original paint that's aged gracefully over time. So, my new plan is to go for a "fauxtina" paint job or a quick rough-up and spray job, maybe using tractor paint. I've attached some photos of cars that inspire me, and I'd love some input on coming up with a plan for something tasteful but with a bit of a rough edge.
As for the engine, while I still think a K24 isn't a bad plan, the process of converting it to rear-wheel drive involves more cost, parts accumulation, and custom fitting than I have the time or energy for right now. Instead, I'm considering finding either a 300ZX with a VG30E and 5-speed for under 3k, or a 2WD Pathfinder or Hardbody that's seen better days, towing it home, and cannibalizing it for its powertrain. This way, I'll have the engine, transmission, wiring, ECU, and all the bolt-on bits I need without the hassle. The VG30 should provide enough power for a fun driving experience, with good torque and fuel injection for daily driving.
At the end of the day, my main goal is just to be able to drive this car and have it look "cool," rather than necessarily being pristine. I want to prevent rust from coming back, and while I plan to make the body somewhat straight, cosmetics seem less important to me. Below are some cars that reflect the aesthetic I'm aiming for, to give you an idea of my plan.


this being my favorite with the 2 tone bre style scheme. Not sure if I like the bre stripes but otherwise I really would like to do something like this I think. Different colors but you get the idea. Look like an old scca race car that's been aging.

That last teal and tan car is one of my favorites!
Hard bodies / frontiers are KA engines ? If I recall the one downfall of the truck engines is that the wiring harness is incorporated into the body harness… just makes it tougher to swap over. They do have the advantage of running a distributor though if you intend to carb it. I love the KA in my 510- great street engine with lots of torque down low. But KAs are getting harder and more expensive to find.
Id really love to do a CA18DET swap… its an old engine but kinda like a mini RB and cheaper than SRs.
A couple people have talked about the QR25 it’s kind of an interesting idea- although kind of an ugly engine in my opinion…
-
Struts/Coilovers are together! just need to attempt to torque the rear stubs one more time. Got them to 150ft lbs… but that’s where my torque wrench stops… also just couldn’t get any more leverage. Planning to put them on the car and try there; just one less thing to hold. Then need to peen the nuts… should have bought the Zx nuts; oops…. Meant to but ordered to quickly- why does anyone sell the old ones anyway?!?

Messed around with a few other things too including the fuel pump. I think I am going to mount it in the factory location. The Carter bracket fits the of the holes just need a shield then. Threw this one together pick it the some spare metal hanging around - seems like it might rattle so considering ordering something thicker… tbd. Also ordered an AN 120 and 180 fitting to clean up that big loop of hose into the inlet.
Hopefully get the struts mounted tomorrow? Will probably try and roll the fenders at the same time- hopefully the struts aren’t too short now for the tool. Then need to mount the front and rear calipers back on. Will need some new hard lines for the front Toyota calipers, but that should be quick. Bleed the brakes and we’re almost back on the ground. Just need to mess with the e brake adjustment… and I’m sure more-
1
-
-
2 hours ago, Crashtd420 said:
I got to take the truck for a good drive today.... it was so nice with the steering wheel position correctly while driving straight.... the turn signal cancel even works better now.... can't believe I waited this long to fix that....
All in all alignment seems to be staying where I set it and drives nice down the road.... the new tires feel no different from any other tire I have bought...
And Bump steer is not an issue......
Only thing I need now is a mat or something to cover the holes in the bed floor...
Inspection got pissy about it last year for some reason....
I used a stall mat from -edit sorry tractor supply -in my old 620- downfall is it was HEAVY…
But… if you wanted to get crafty a wood floor cover would be cool.
So lame that that they will give you trouble for the floor of your bed… has no effect on anything or anyone…
-
Few days of rain and have been battling the “plague” … but finally got back out there again today.
Picked up my struts- guy did a nice job on them. Cut, blasted and welded them for $150 I can’t complain about that! I do wish he had taped things off a little better before blasting… but not damage that I can tell. I didn’t know he was going to blast them so I didn’t have them pre-masked.

Spent a good hour cleaning them before paint- then masked and painted.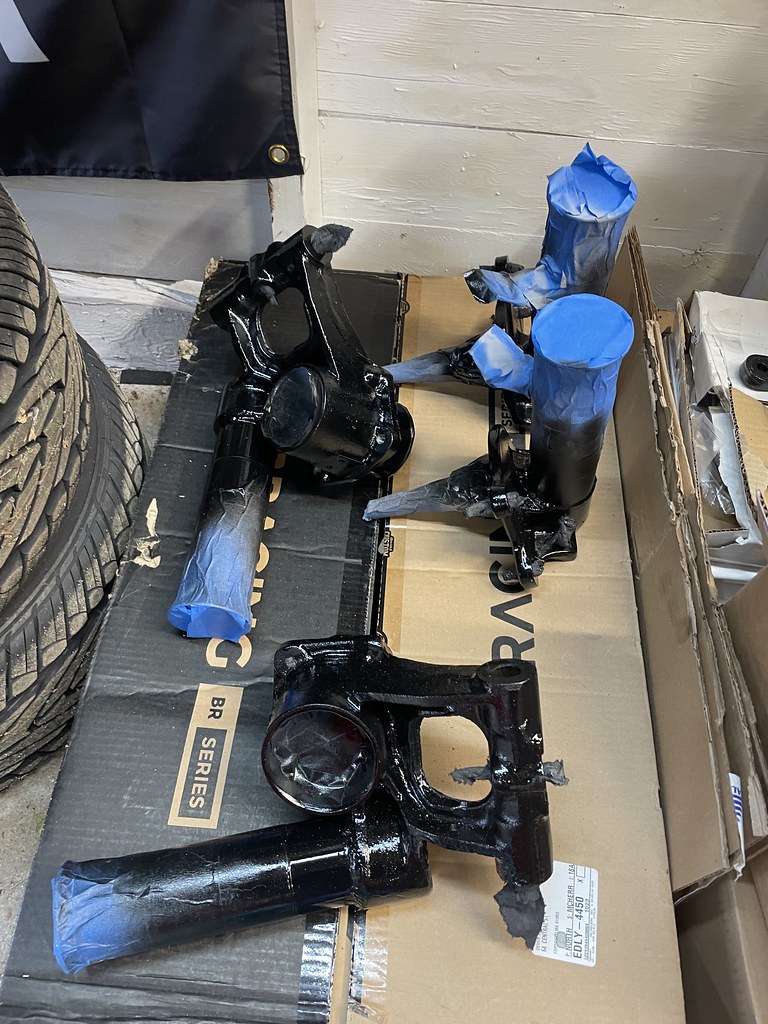
Picked up a tap from Amazon and got lucky and was able to savage the threads on the one stub axle. Hit the other one too for good measure and the new nut threads on smoothly on both now.
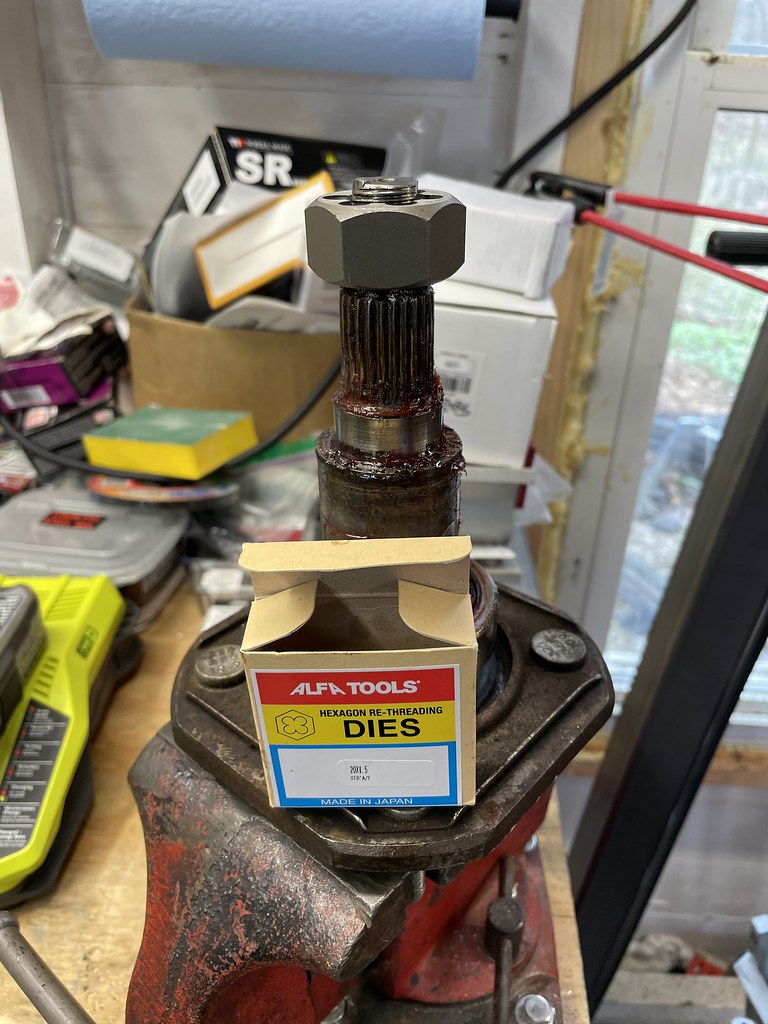
Grabbed a couple other tools that came in handy… clamshell? Bearing puller, and FWD bearing tools used both of them and happy to have them on hand now for future use rather then the parts store tool rental.
Got my extended studs in as well- ball joint tool worked well for popping the old ones out. Was hoping to use my press to put the new ones in but the bench top one just wasn’t big enough… should have just bought the big one before… but don’t really have space for it… thankfully the Z car depot spindle tool I picked up (and broke) utilized a stud pulled so I used that instead.
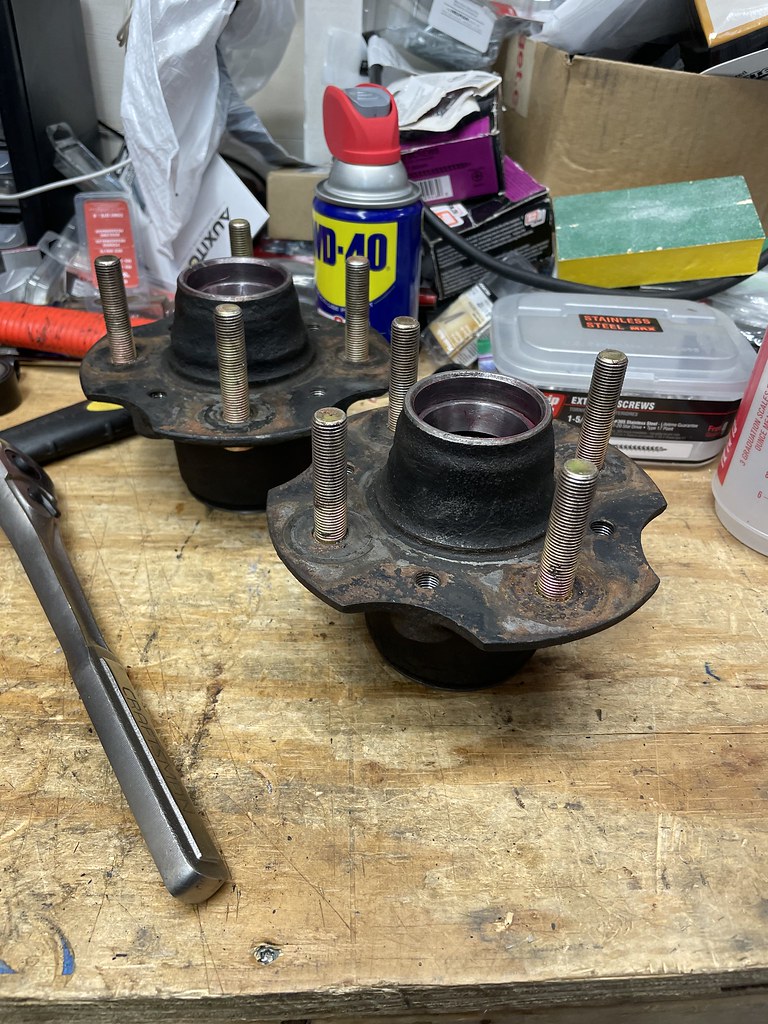
Also got the front bearing races in and trimmed my rear disc adapters - they are a 4 bolt plate for the 280zx calipers so require the stubs to be removed; now if (when) I decide to upgrade the brakes I won’t have to do the stubs again.
Making progress toward getting the car back on the ground- most likely not tomorrow but definitely this week or next weekend.
-
2
-
-
Snuck in a little bit more time today. Was able to get all the strut towers opened up and trimmed for camber adjustments. Forgot to take a picture after paint.

Not perfect… but I’ll take it as a win- best I’m going to get with a Dremel. Some people open up the rest of the “ears” which looks nice but isn’t really needed. I’ll probably end up hiding them with a T3 strut bar anyway… I know it doesn’t do much but for some reason I like the look of them on the Z.
Also found someone to weld up my coilover sleeves. Drove past a neighbors house and he was working on a Chevelle, stopped to ask him and turns out he’s a welder for the power company. Dropped em off with him and should hopefully have them back for the weekend 🤞. I’ll work on prepping the hubs with studs and new bearings in the meantime.
-
2
-
-
Got some good wrench time in today.
The z car depot tool showed up and I was able to get the rears off. Passenger came off no problem… driver put up a fight and ultimately destroyed the tool; but I was able to get it out. Got the rear struts striped down. Decided to pull the stubs since I couldn’t get the brake bracket off without pulling them, and can’t swap the studs with the bracket on- one of them had a click when spinning it around too… I may regret pulling them tough as one of the threads is a little buggered… I do have rusty spare so maybe I’ll clean that one up.

Got three of the strut towers opened up with a hole saw. Need to do the 4th still and then open em up a little more with a grinder.
Going to make some calls to welders tomorrow.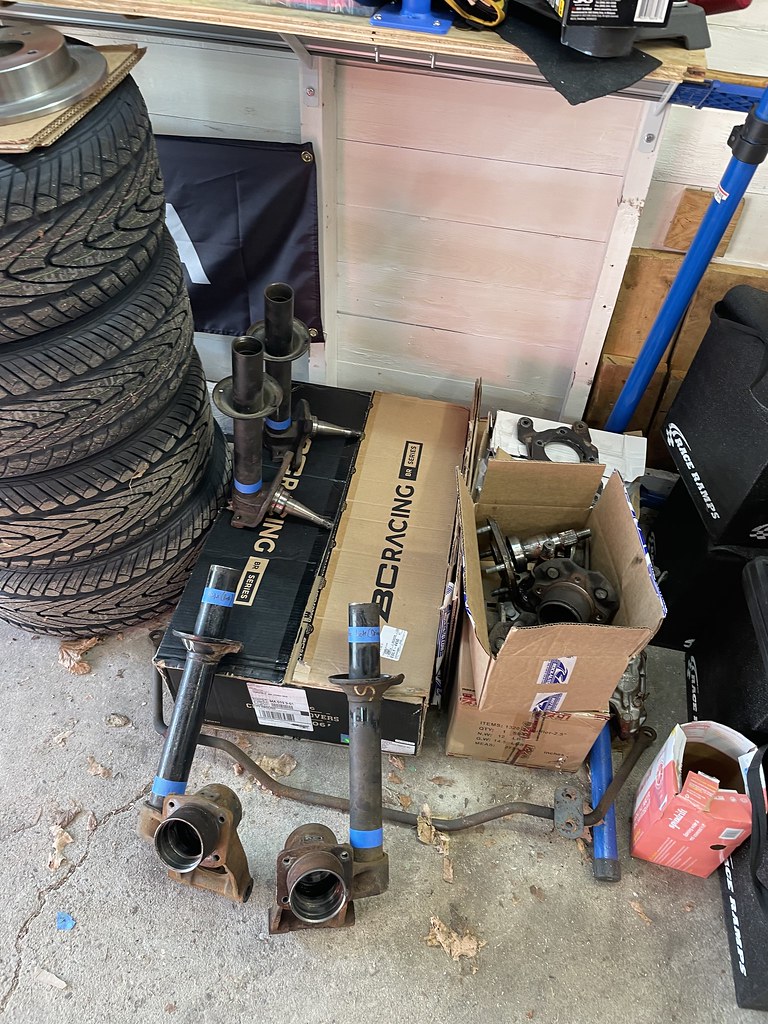
-
2
-
-
Hopefully spring is here to stay now! We had a few nice days and then 3” of snow!!!! Warm weather returns though…
So suspension work has begun!
Got the rear end mostly torn apart- thankfully? Someone has worked on this car before so the half shaft bolts came loose and the spindle pins seem like they will come out- atleast on of them… Z car depot tool shows up tomorrow.
Then I got the front end torn apart and the front struts ready to be cut. While I was in there decided it would be a good time to get the new rack in. Went in without too much fuss- just need to toss the u bolt back on.

Hopefully finish removing the rears tomorrow and cut all of them down. Then need to call around and find someone to weld them up. While that’s happening I’ll trim the strut towers for camber adjustment access, add the extended length studs, mount the new front rotors to the hubs and replace the front wheel bearings- don’t think I’m going to deal with the rears yet… but tbd. Also going to get the H4 bulb conversion in while the wheels are off, and planning on replacing the fuel pump while the car is up. Also going to remove the vapor line that goes to the front of the car since I’m not using it.Debating deleting the brake booster now as well- expecting vacuum issues with the Mikuni set up (although may be fine… plenty of people running triples and are ok)…
-
2
-
-
On 3/27/2024 at 12:57 PM, Stoffregen Motorsports said:
I have noticed a ton of new tire brands hitting the market lately. Obviously these are new brands to sell cheap tires because of the obscene prices of name brand tires these days. In the past I would shy away from off brand tires because there always seems to be some major glitch, like they don't balance easily, or are out of round or tread separates after a couple years, but I'm willing to bet some of these new brands are actually produced at the same plants as the major brands.
Tire and bacon prices are good earmarks of the economy. Bacon is a commodity and tires largely come from overseas. When I built my 1957 Land Rover, back in 2002, the 34x9.50-15 Intercos cost $145 each, then they jumped up to $225-$240 each and stayed there for a long time. Two years ago the price skyrocketed to $560 each, and just yesterday I notice the price had come back down to $390-$420 each. This graph is nearly identical to the behavior of the economy over the past two decades.
They all come from the same few factories anyway…I still am partial to some of the name brands though- running Falkens on all three right now (Tacoma, 510, and Z) as they seem to have a good bang for your buck with their performance tires- but I do recall finding in my research that many of the Sumitomo tires are essentially the same as their Falken counterparts since they are made in the same factory. My most recent purchase was a set of Kumho ecstas “all season” and they seem pretty sticky- haven’t had a chance to drive on them yet though….
It seems many of the actual manufacturers are trying to get in on the consumer direct game with their own “brands”
-
1
-
-
1 hour ago, Crashtd420 said:
I actually just found another good deal....
Everyone wants 100 to align the truck even if it is in spec...
Firestone will check it on the machine for around $25-$30.... no adjusting....
I'll be able to make adjustments from their readings after if necessary....
Might have to keep that in mind for the Z - everyone wants $100+ and currently the only adjustment is toe- I’ve got a new rack and tie rods to go on and I can get it close at home with a tape measure… and then I’ll know where the camber is at too once I get the coilovers on.-
1
-
-
Just looked back- not running a spacer

and here’s one more of what was cut from the tunnel - based on this you probably don’t need to cut as much forward as I did. I remember really wrestling around with the engine/trans trying to get it all lined up… If I recall i think it was more to do with pan clearance with the pan I had made up for me. So I had cut more up front to try and raise it up all to level it out.

-
1
-


'73 240z - Project Build
in Z-Car
Posted
Slow progress... but getting there!

Biggest issue right now is the throttle cable - its super long in the photo, but was hoping it might work short term- but its too flexy. The cable is the ProTunerz one and it is essentially a waste of money... came with a nice firewall bracket that doesn't fit... along with other issues... going to try and make it work for now.
Fuel lines are run and attached. Exhaust is all back together.
Hopefully tomorrow is a test day!