


Tank.
-
Posts
88 -
Joined
-
Last visited
Content Type
Profiles
Forums
Events
Store
Classifieds
Posts posted by Tank.
-
-
15 hours ago, RyanC said:
Nice trim and seat. Is that a pocket at front if bench seat.
Thanks, yes it is. I saw a seat with this and it seemed handy to slip a phone or whatever in it.
-
 2
2
-
-
Got the seat back from the upholsterer today. The pictures look less blue than it is, regardless it's going to look great in the truck.


-
9
-
-
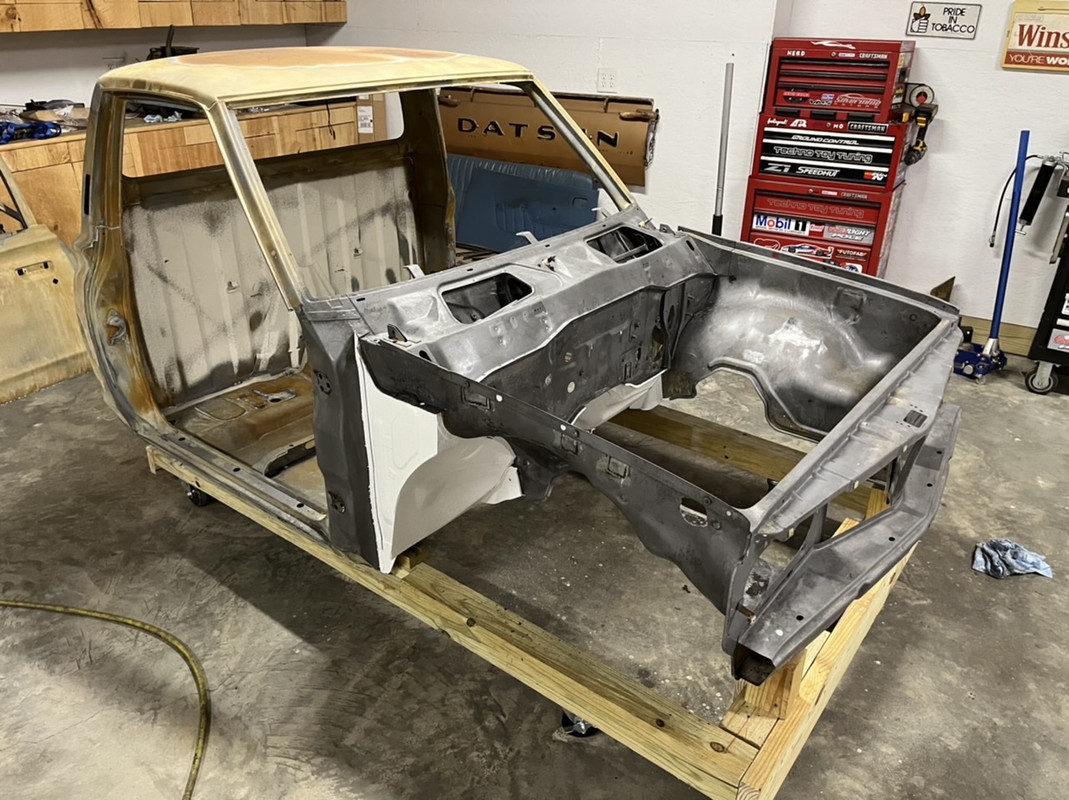
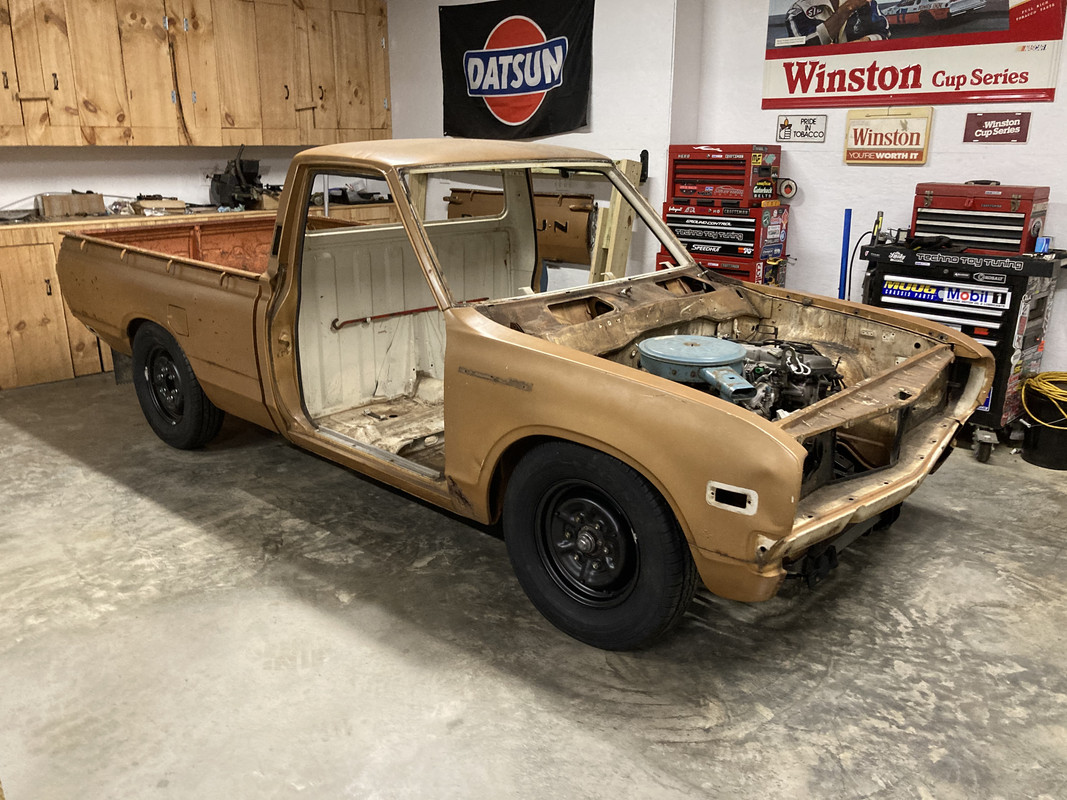
@RustedRails Upright and accounted for! Still around, as far as the truck, just finished up all of the metal work on the cab. The fenders took a lot of work and there was some work to do on each door after I replaced the rockers. So I'll be prepping it for paint while metal work is being done on the bed.
-
1
-
-
1 hour ago, EDM620 said:
Oh how I wish my cab floor had been that solid!
It surprised me when I first saw the truck. The only patch there isn't because of rust, it was simply to give a bit more room for the exhaust. Didn't have to do it, but it will be better with a little more clearance/breathability.
-
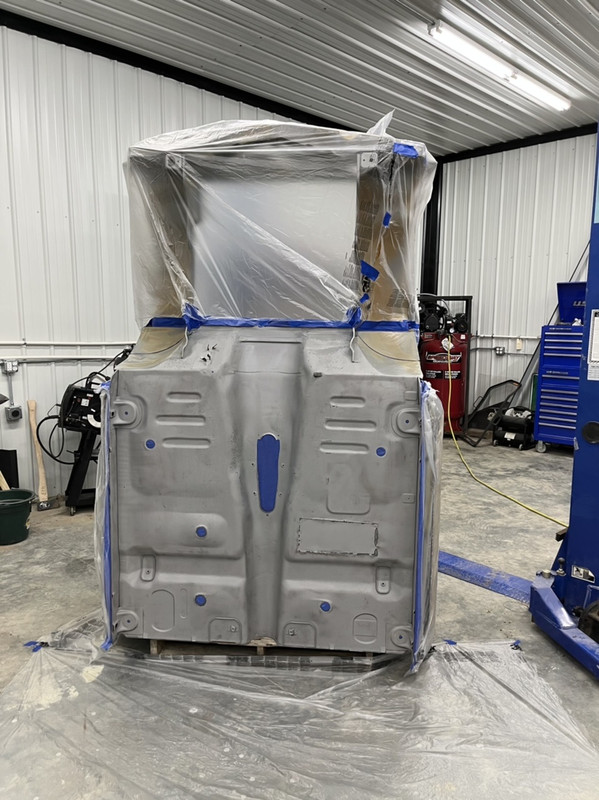
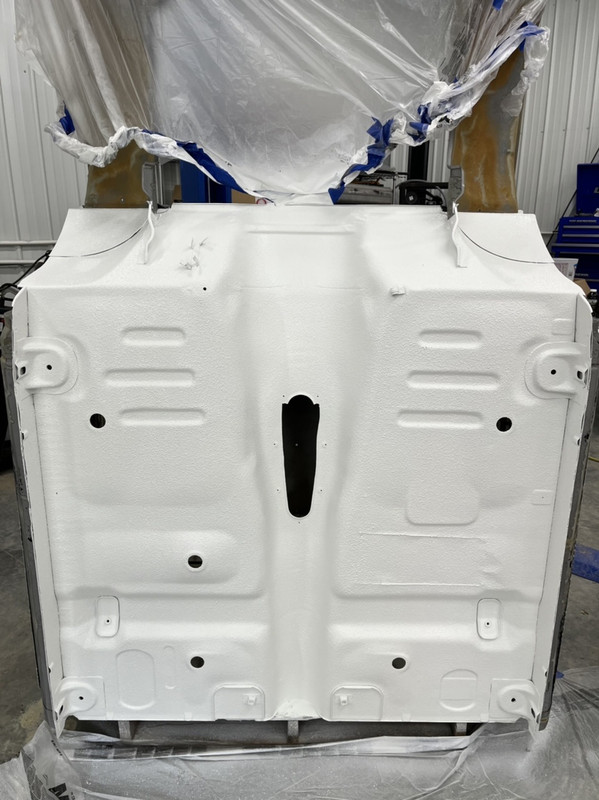
It’s been awhile! Starting digging in again on this thing and had the body sandblasted. I primed the bottom and sprayed 2 coats of raptor liner, I’ll use this in the bed as well. Then started cleaning/smoothing out the engine bay.


-
6
-
-
Awesome! I love my vq swap, it’s soooo much fun to drive.
-
35 minutes ago, EDM620 said:
Looks great Tank, you've put some slick touches into the build. Curious as to your gas fill location in the bed floor. Won't it be a PITA to fill and guess you won't actually be carrying anything?
I do plan on using for light truck stuff so I’m still working out the details for the filler. It’s been a while since I have done anything to it but hopefully I’ll be able to put more time in soon.
-
Looking great, I love the extension on the bed side and the roll pan. I’m planning on doing the same thing for both.
-
On 12/28/2021 at 8:49 PM, ECS620 said:
Right on. Thanks Tank. I've been keeping my eye out for a good one. It looks like only the 240's had the wood steering wheel, is that right?
I believe so, but all S30 steering wheels would work.
-
1
-
-
2 hours ago, ECS620 said:
I'm interested in replacing the steering wheel for this truck. Does anyone know if a Zcar steering wheel will fit the column on a 620?
Indeed it does, I’m putting my original 73 240z wheel in my 620.
Nice work so far, looking good.
-
If I had to redo my rear end setup, this is exactly what I would do. Looks great, but more importantly it should perform fantastic.
-
1
-
-
I’m a fan of magnaflow, that’s what I have on my Z along with an oem 350z resonator. Even though it’s a VQ now, it still sounds very similar to my F54/N42 setup.
-
1
-
-
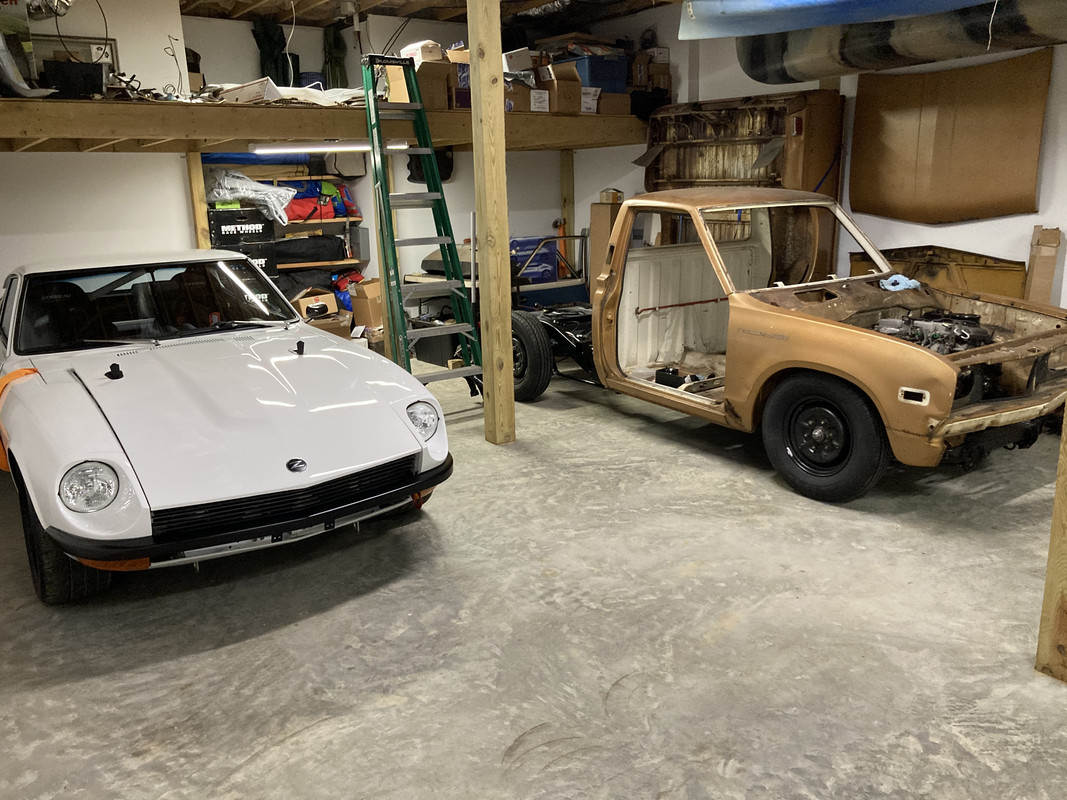
I put the bed back on to test fit and fabricate a few things. Dialed in the rear ride height as well. Seeing it like this helps keep me motivated.
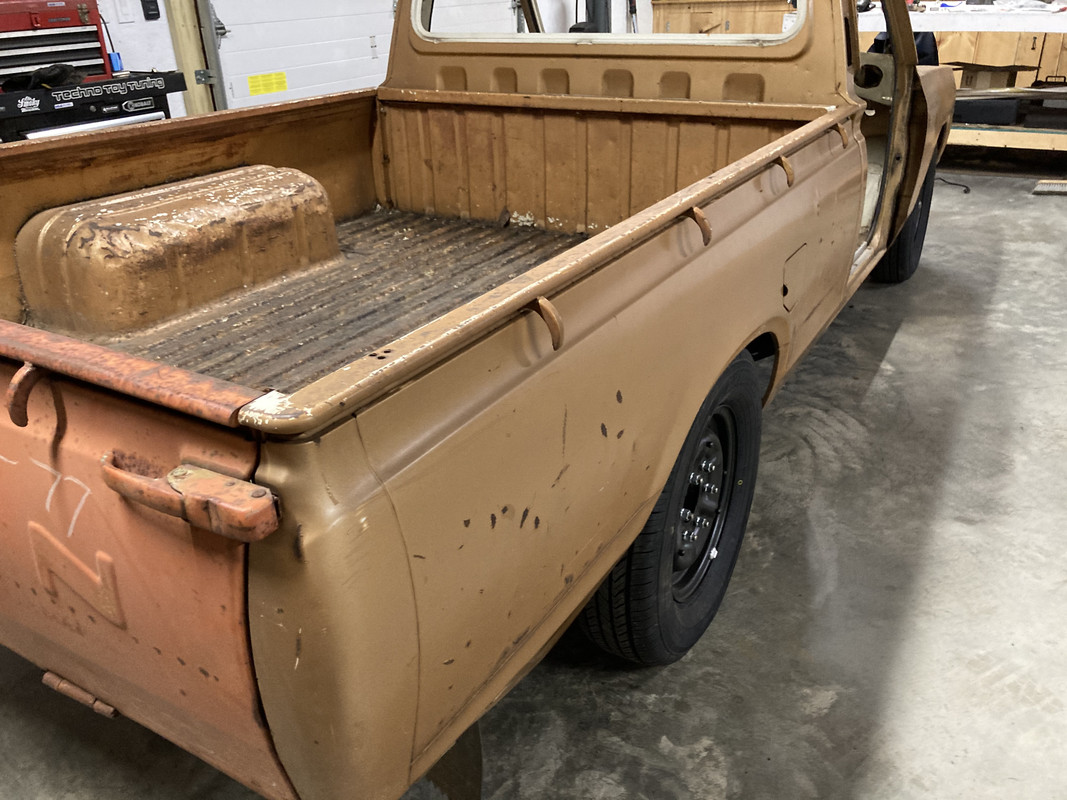
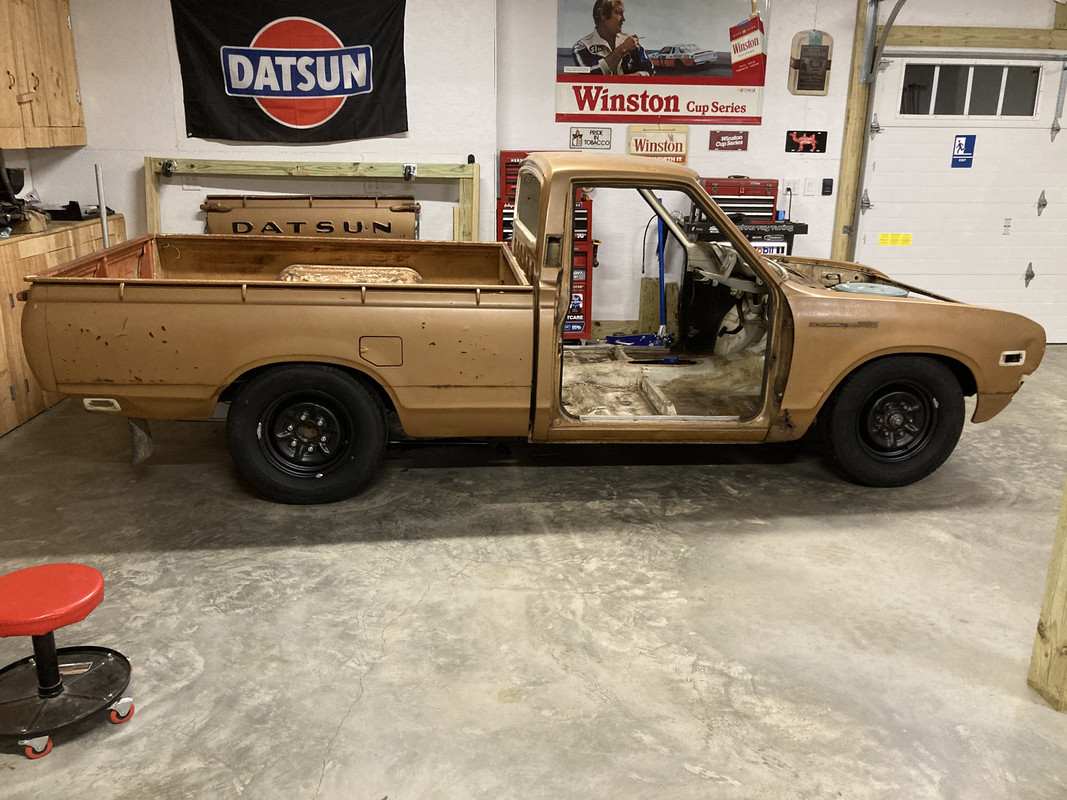

And for the new fuel filler, it’s in the bed. I already made a hinge for it, just need to weld it on. The fuel filler in the bed is a love it or hate it thing from what I’ve read. I still plan on using this for truck stuff but this was the best way to do it to keep the tank as high as possible.

-
4
-
-
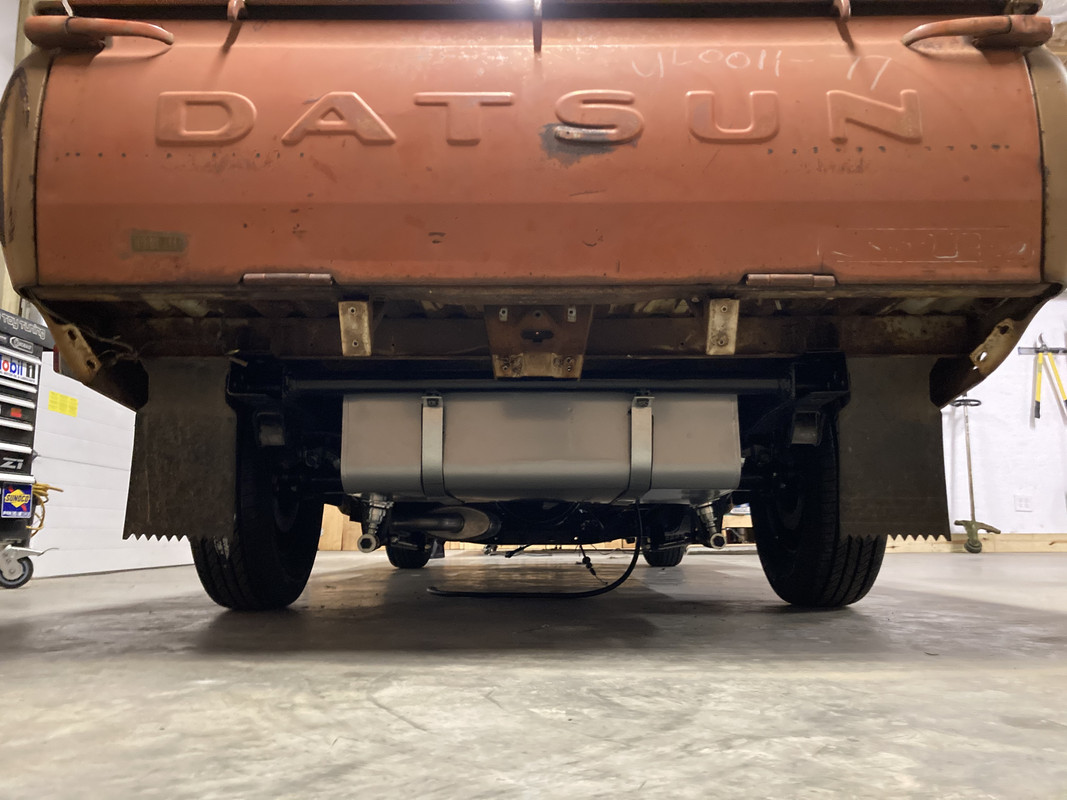
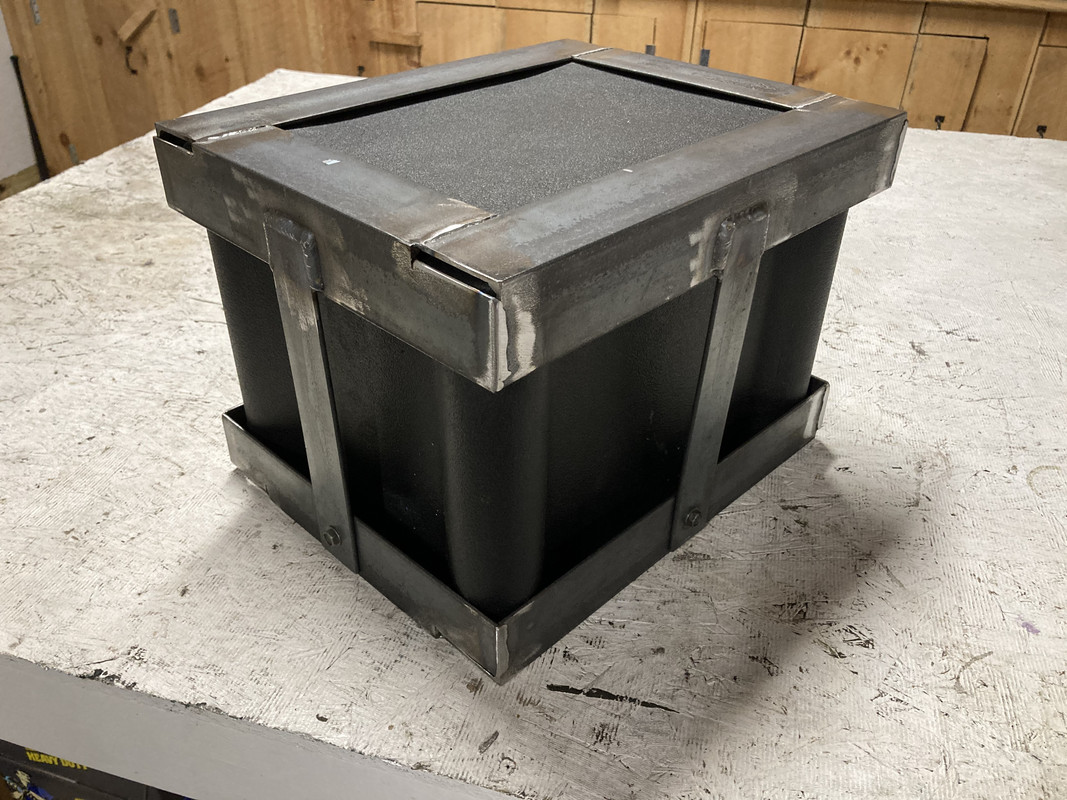
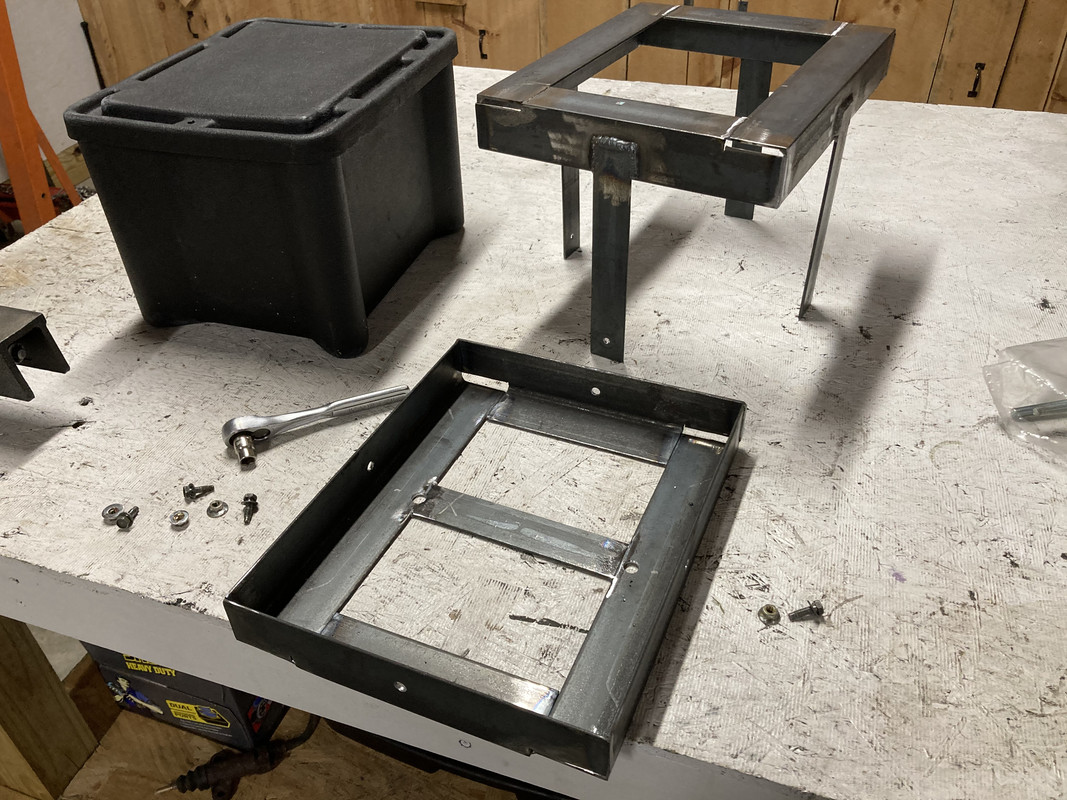
As for the battery, I am relocating it below the bed. I got this plastic box and made a cage for it. The upper part will be welded to the bottom of the bed, the lower part bolts on so the battery box can be lowered out. I plan on using the old fuel filler area to mount jumper/charging studs.


-
3
-
-
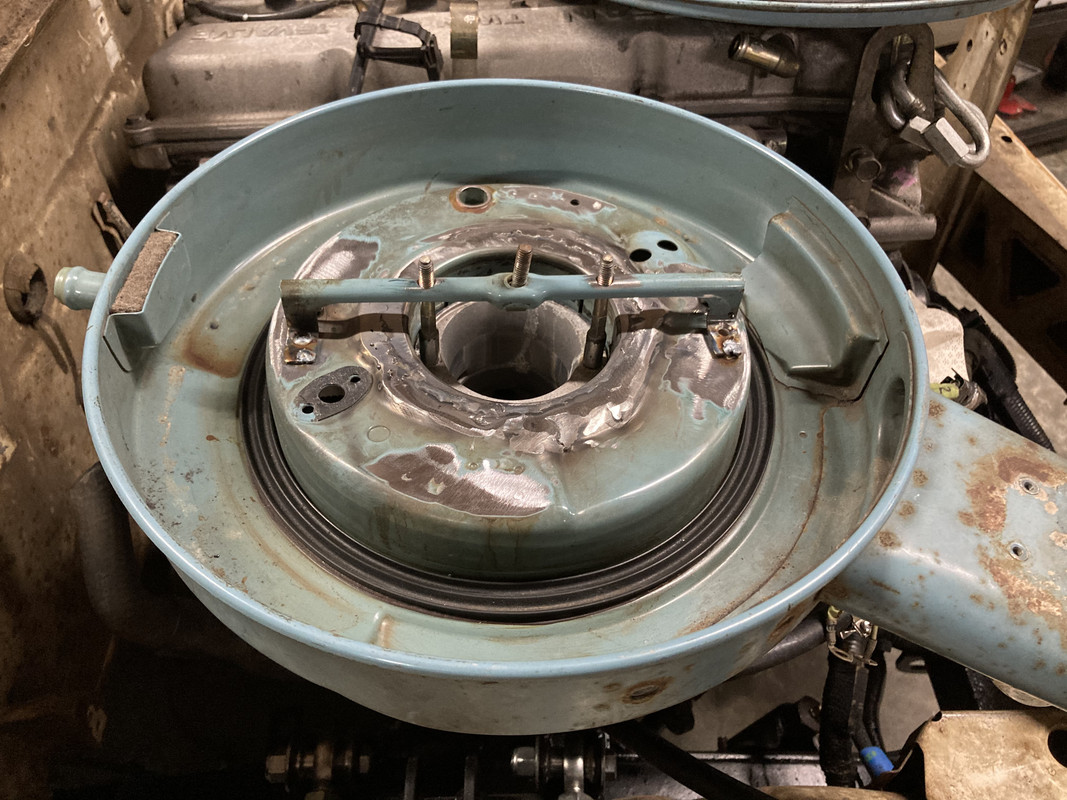
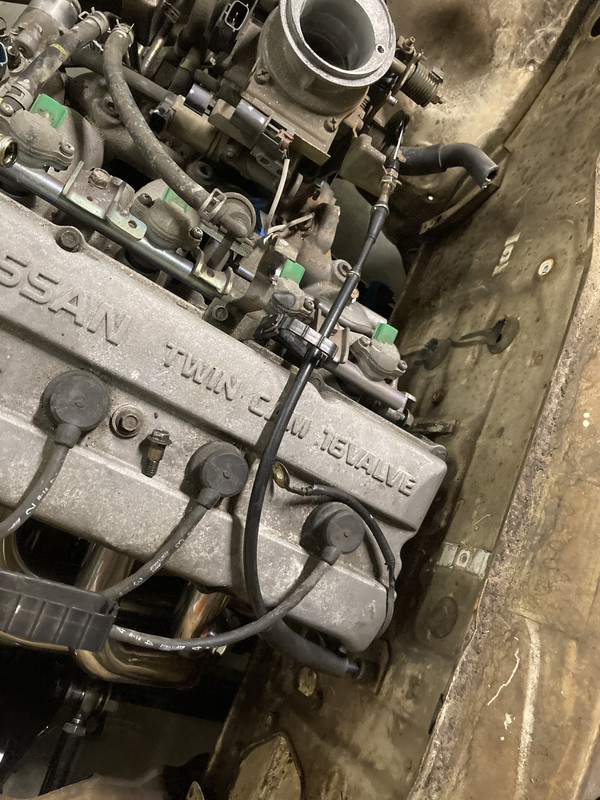
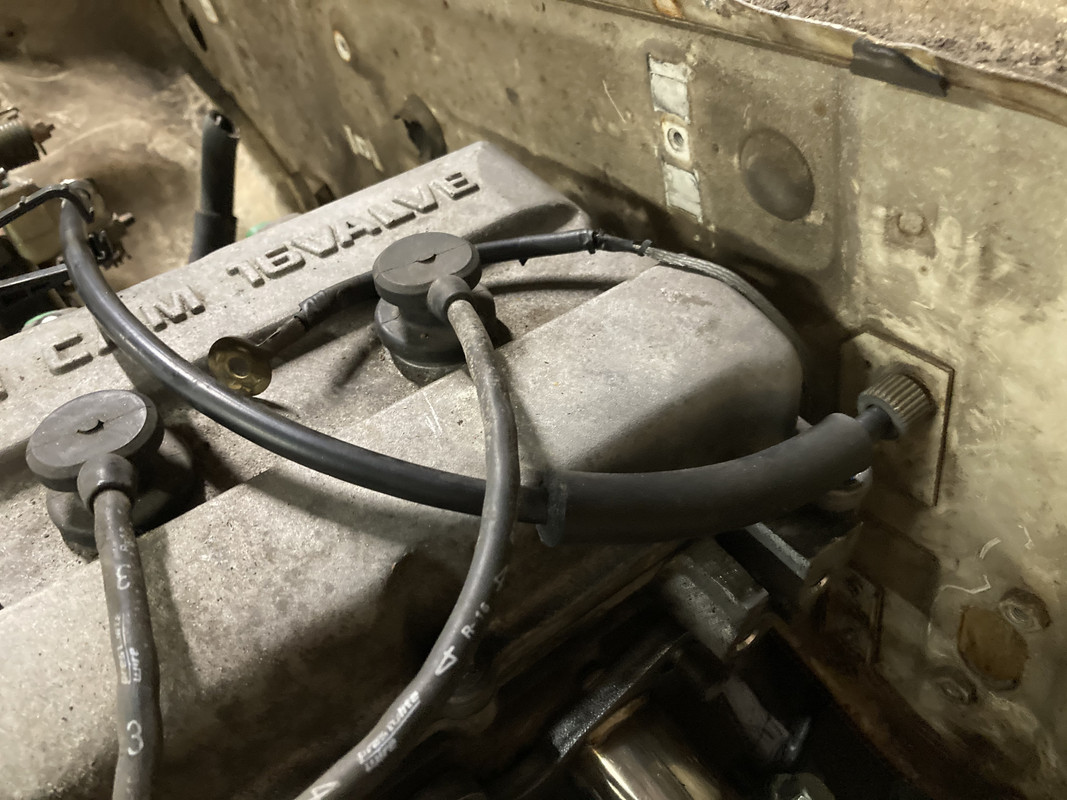
Worked on the air cleaner a while back. I adapted an L20 intake/air cleaner to the truck intake. I still have a lot of cleanup to do on it and paint it but functionally its good to go. Why did I do this? I looks better than the plastic crap from the Frontier.
I cut the center of the base nearly all the way around so I could level it to the engine, then welded it back. From there cut the cross piece that the top screws to and rotated it to work with the KA intake. Then I sectioned the air cleaner studs 1-7/8” so the L20 intake could bolt to it, drilled 2 holes and it now bolts down. Finished it by drilling a hole in the inner fender for the intake tube to go through.

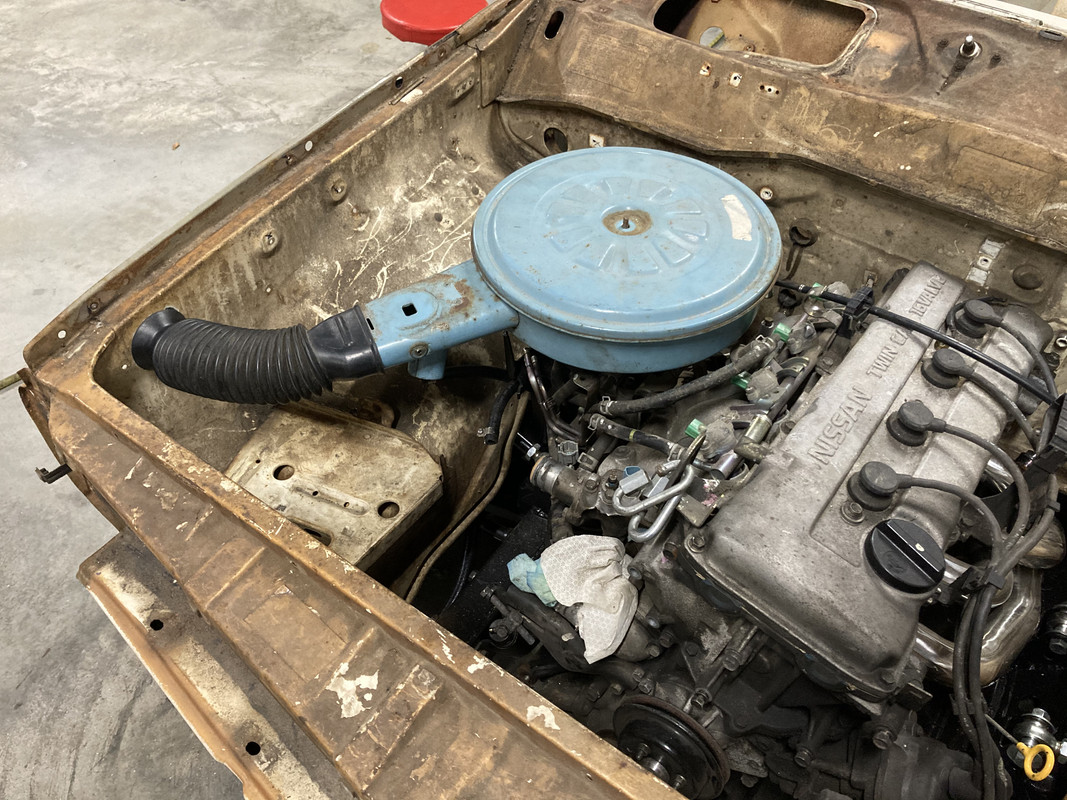
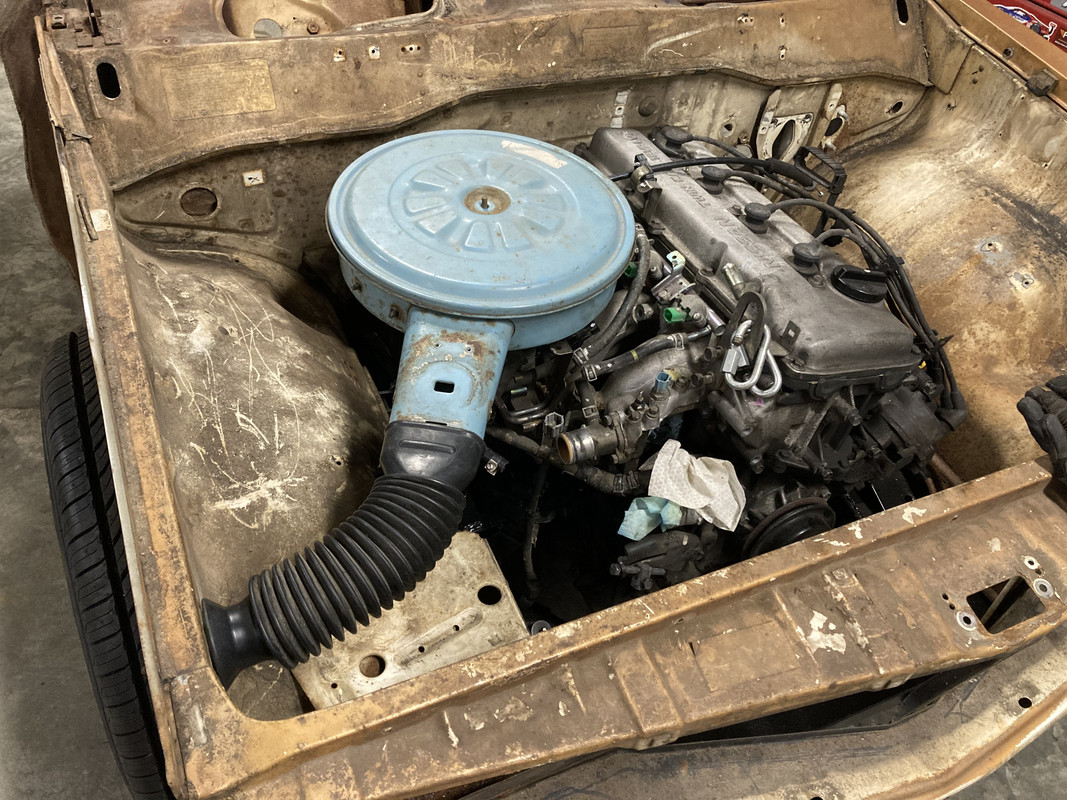

I plan on adding some sheetmetal in the inner fender to keep dirt/water/debris from flying up in there. A kind of scoop of sorts that goes down.
-
4
-
-
8 hours ago, ShutterMeShort said:
Well this escalated quickly! LOVE the front end set-up. Super clean work.
Inspiration to get my project back on track...Thanks, I’ve done a few other things recently and need to catch up here but hope to work on it more since it’s pretty much winter again.
-
19 hours ago, Snohomishdatsun guy said:
Great info. I'm following along behind you with a ka24 myself. At least I'm heading in that direction. Maybe.....

I have the motor anyway.
Nice, looks like a clean example to start with.
-
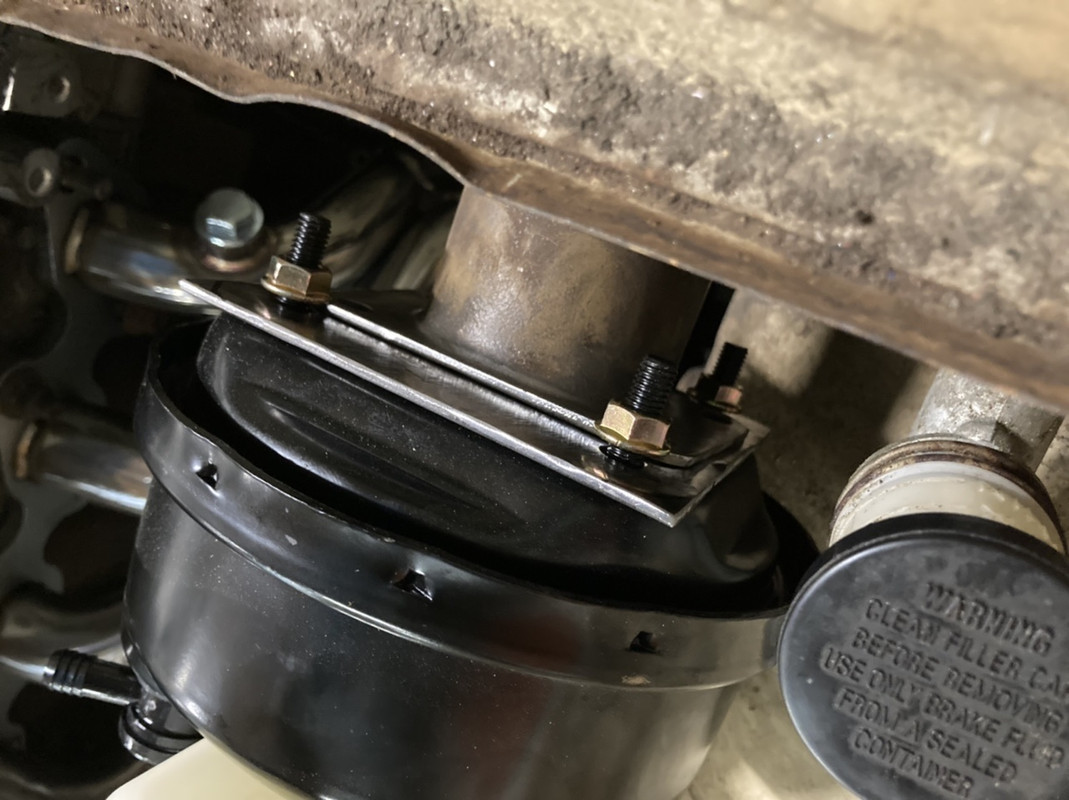
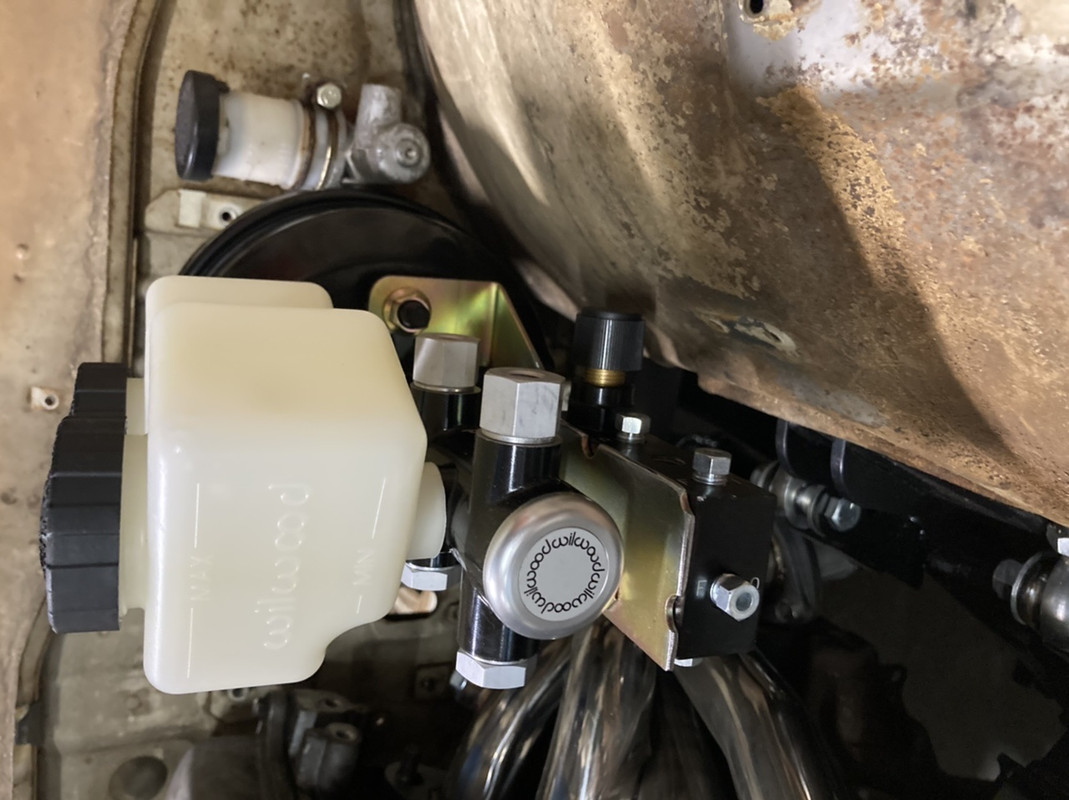
Finished up the mechanics of the brakes, and made the accelerator cable.
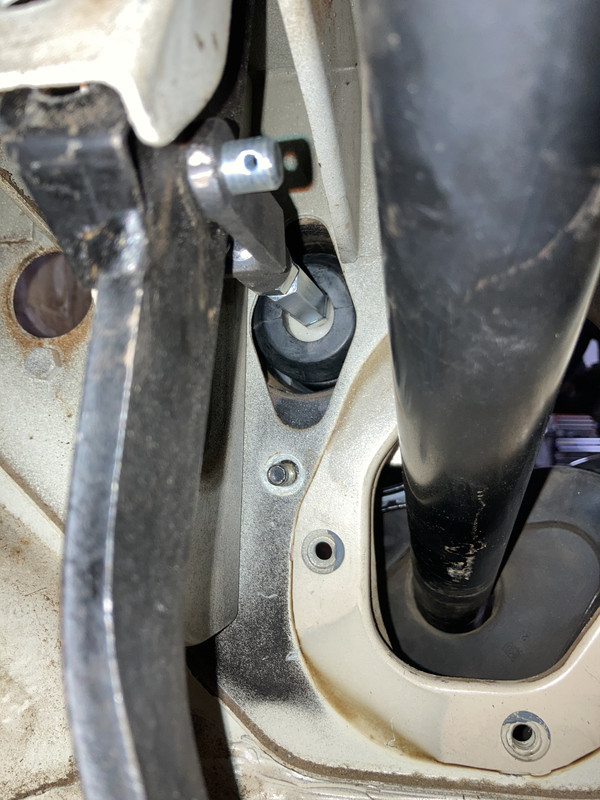
Just ordered a new rubber stopper for the brake light switch, but otherwise the brake setup is all good.
For the accelerator cable, I took pieces from the original and modified the frontier cable to make one. So at the firewall to the pedal, it’s 620 parts. From the firewall out, it’s frontier. Turned out to be 27” tip to tip.

I cut the frontier cable, and the made a new end for it. So I drilled down in a piece of wood about 3/8”, then melted lead in it with the cable. From there I shaped it to mimic the original so the oem clip still works for the 620 accelerator pedal.
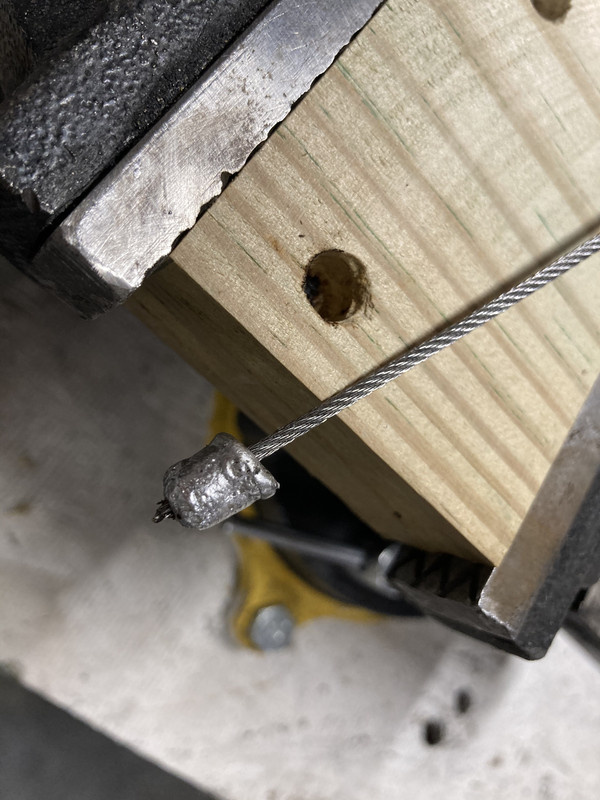

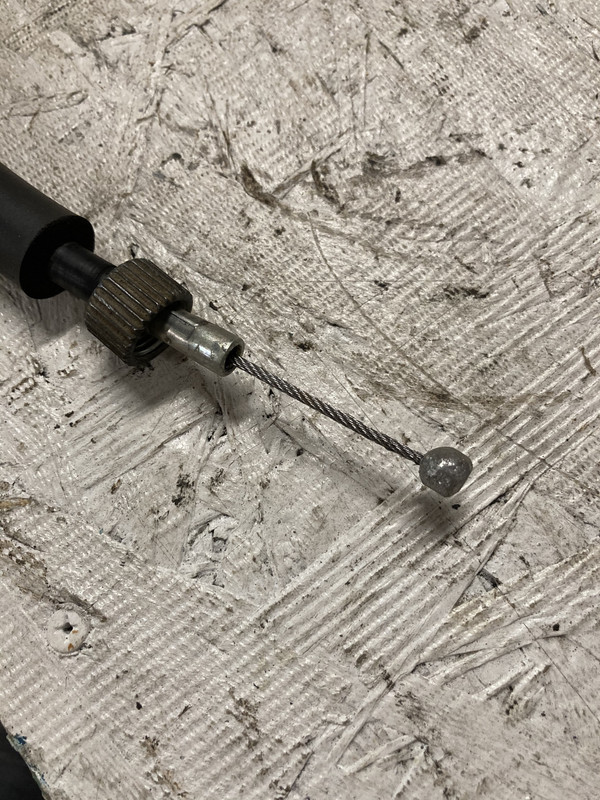
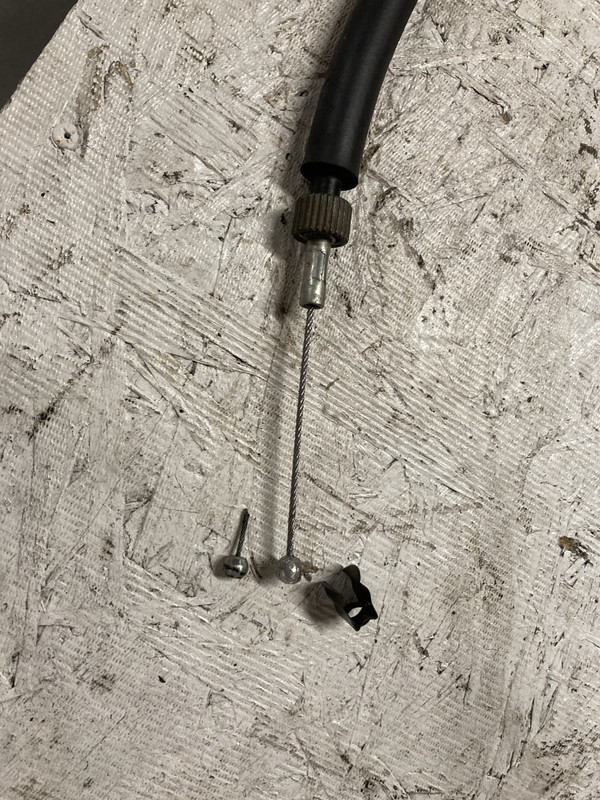
Works great! From there I made a pedal stop on the back of the oem pedal. Forgot to get a photo of that but I will at some point.
-
2
-
-
What a journey…nice job! That sense of accomplishment when everything works is priceless.
-
1
-
-
22 hours ago, UnderControl said:
Nice work. Making me feel like a slacker.
It took me 12 years to build my Z, I’m really trying to have the truck done a little faster…lol I’d like my son to learn how to drive a stick in it, he’s 5 now.
-
 1
1
-
-
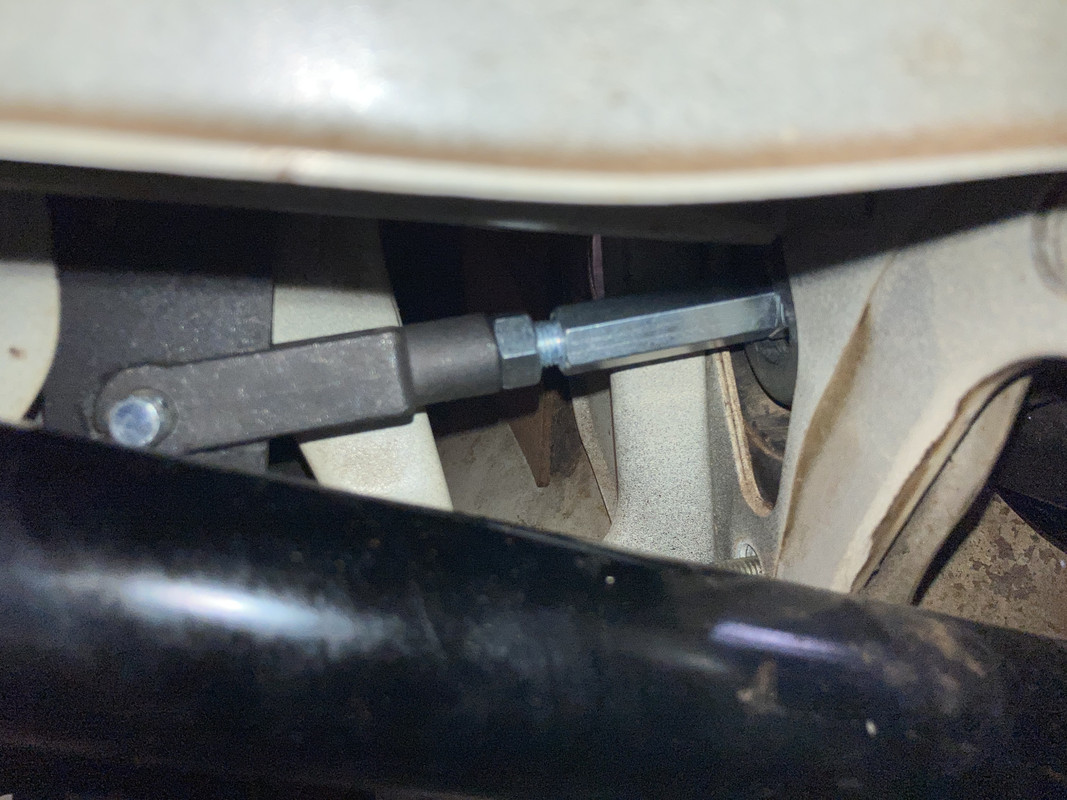
Worked a little on the master cylinder/booster setup. I’m changing to a 3-3/8” square booster bolt pattern (which is a very common booster pattern) and a 7” single diaphragm booster. And I got a really good deal on a wilwood master cylinder that I couldn’t pass up from a buddy.
So I made an adapter plate out of some 2” flat stock, cut 4 pieces and welded them together.
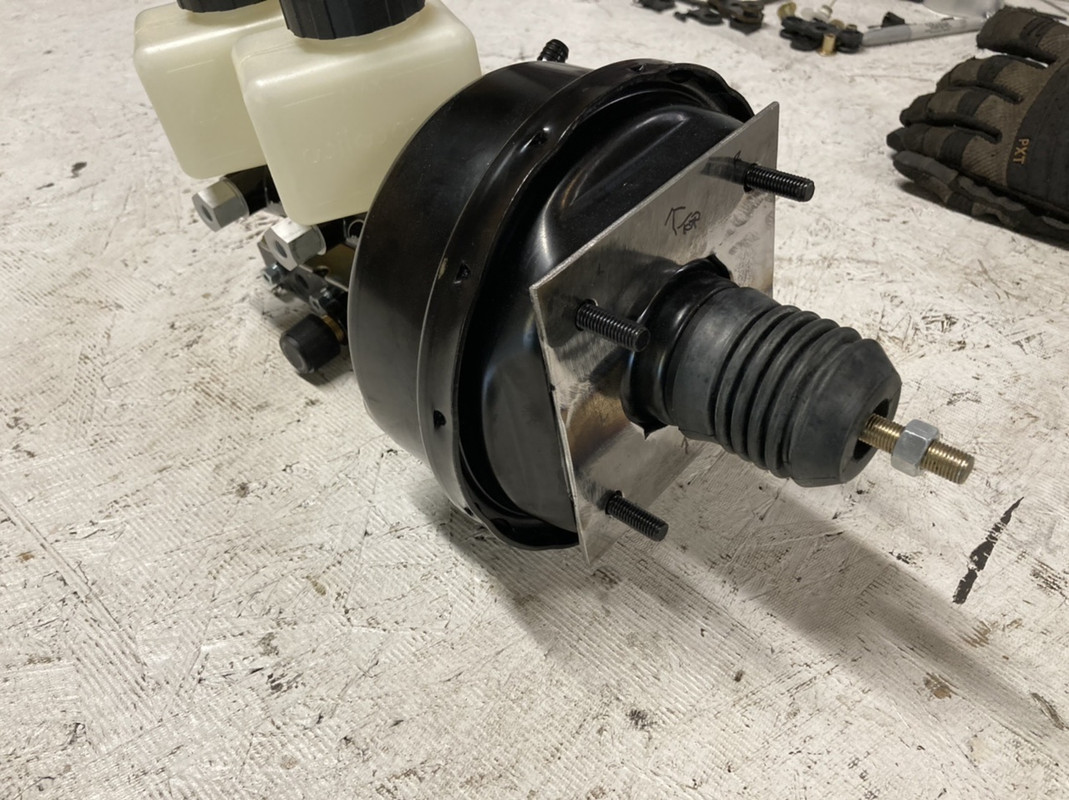
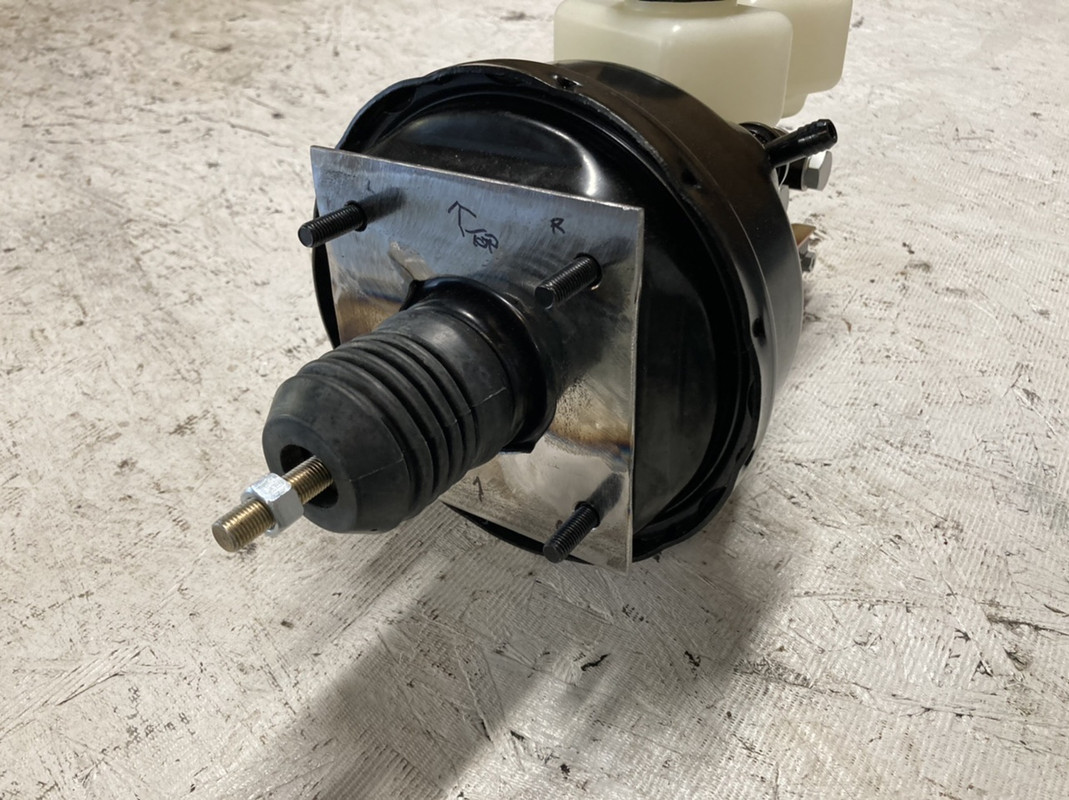
Now the idea is to weld the OEM booster bracket to the bracket I made. I’m not going to weld it until I put the steering column in so that I can get the booster exactly where it needs to be.
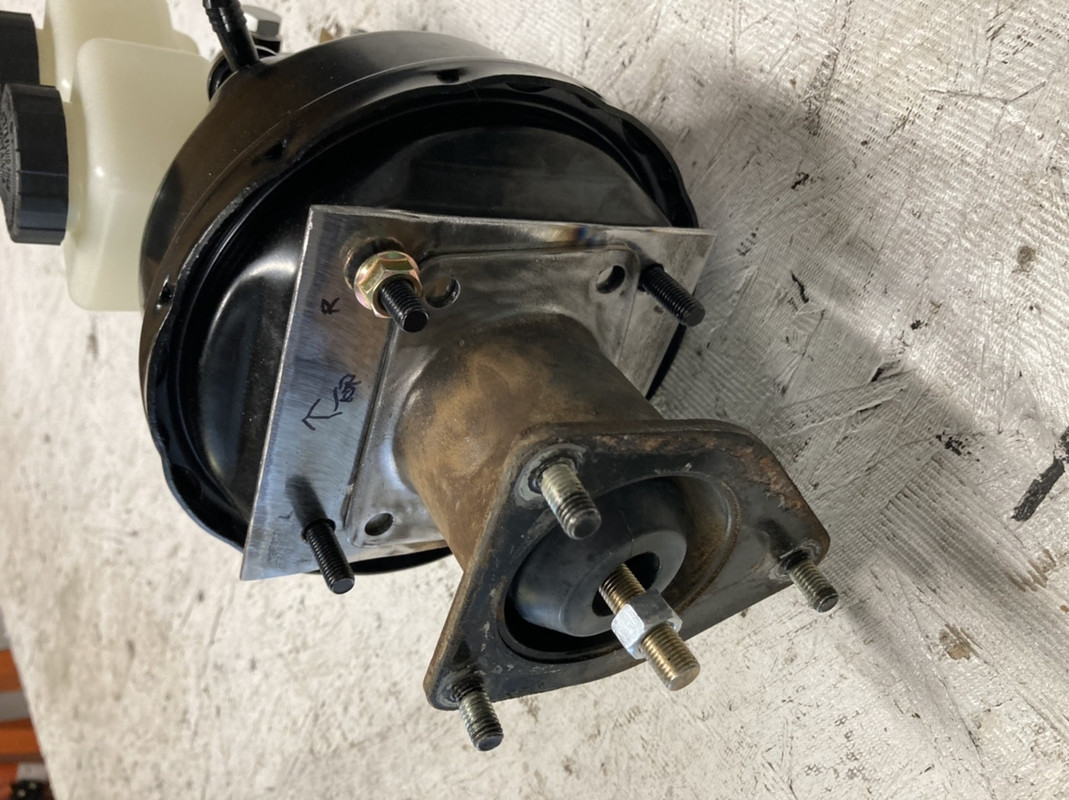
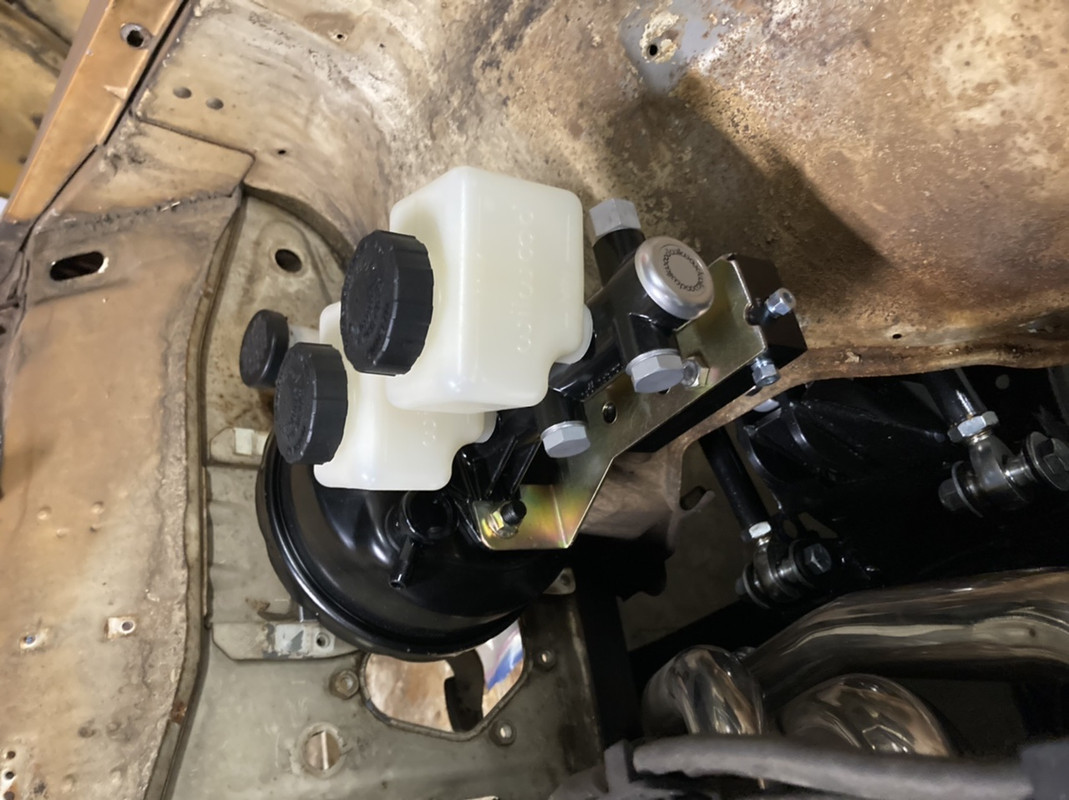
So now I’m pretty much running a very common chevy pattern of which parts can be found anywhere for years to come.
-
5
-
-
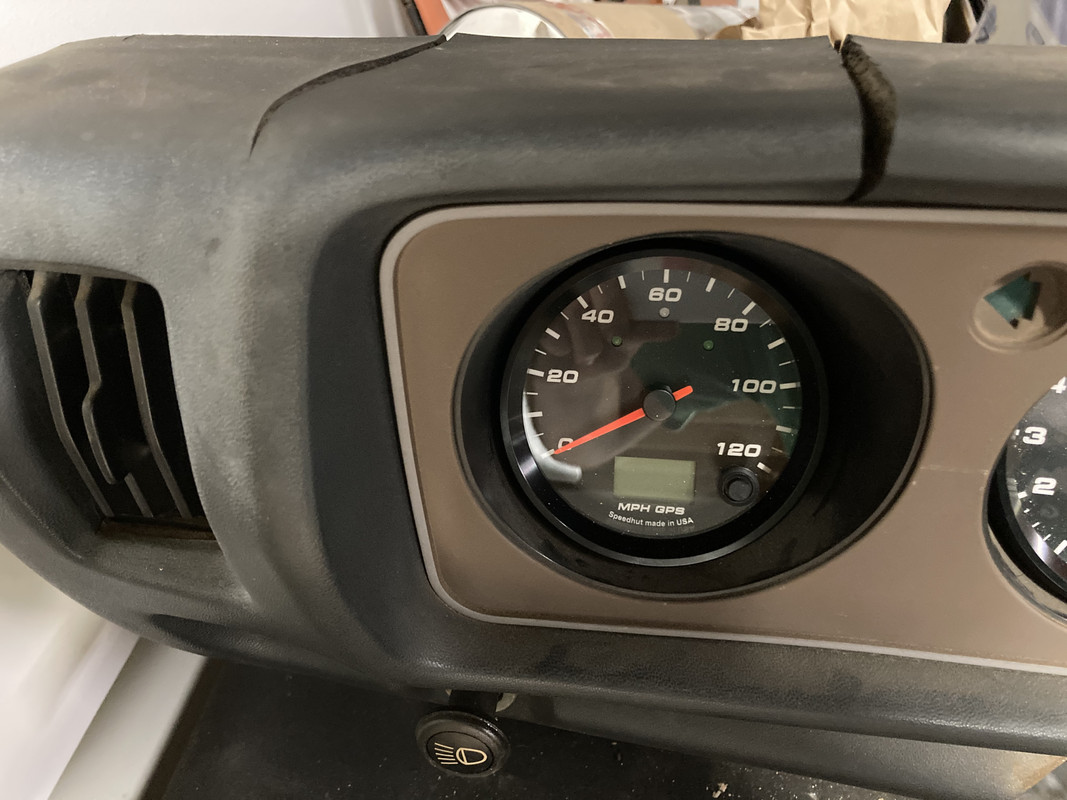
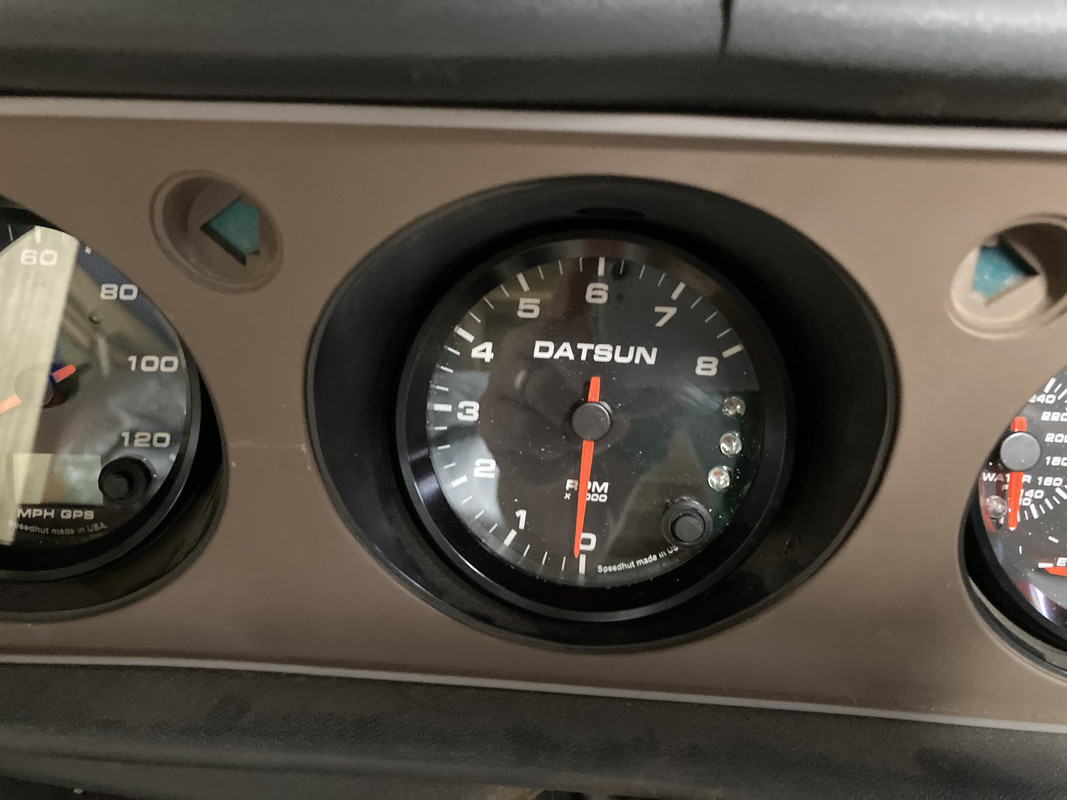
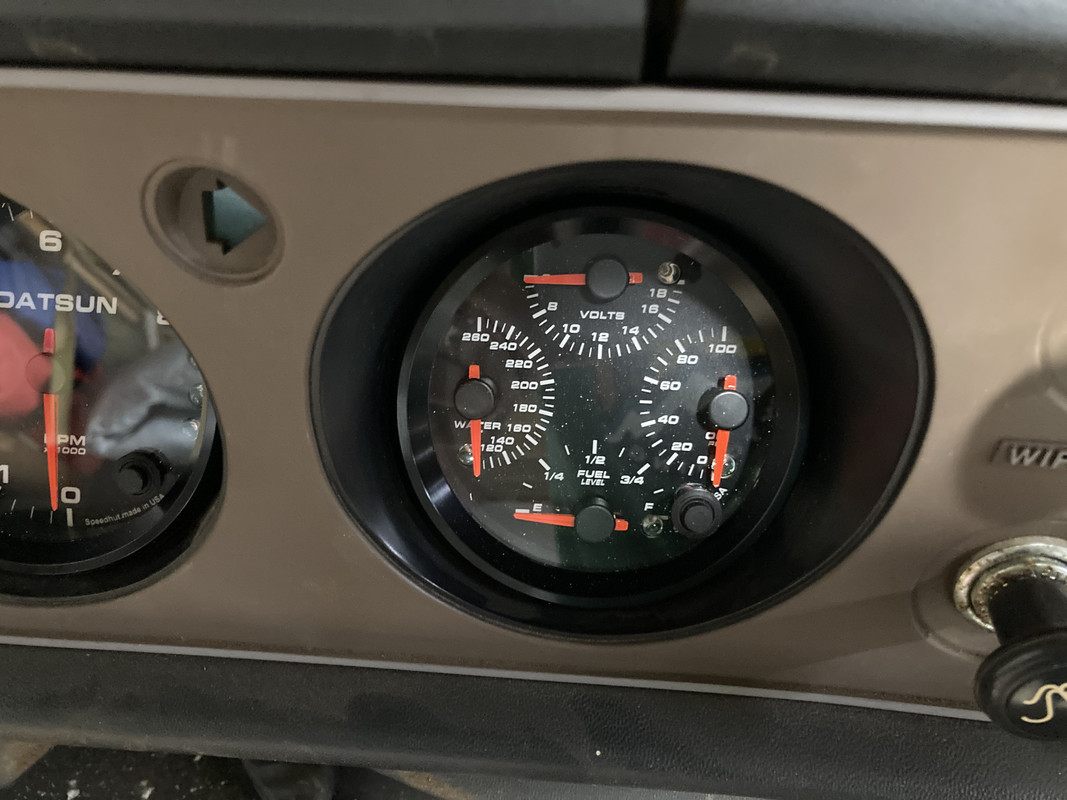
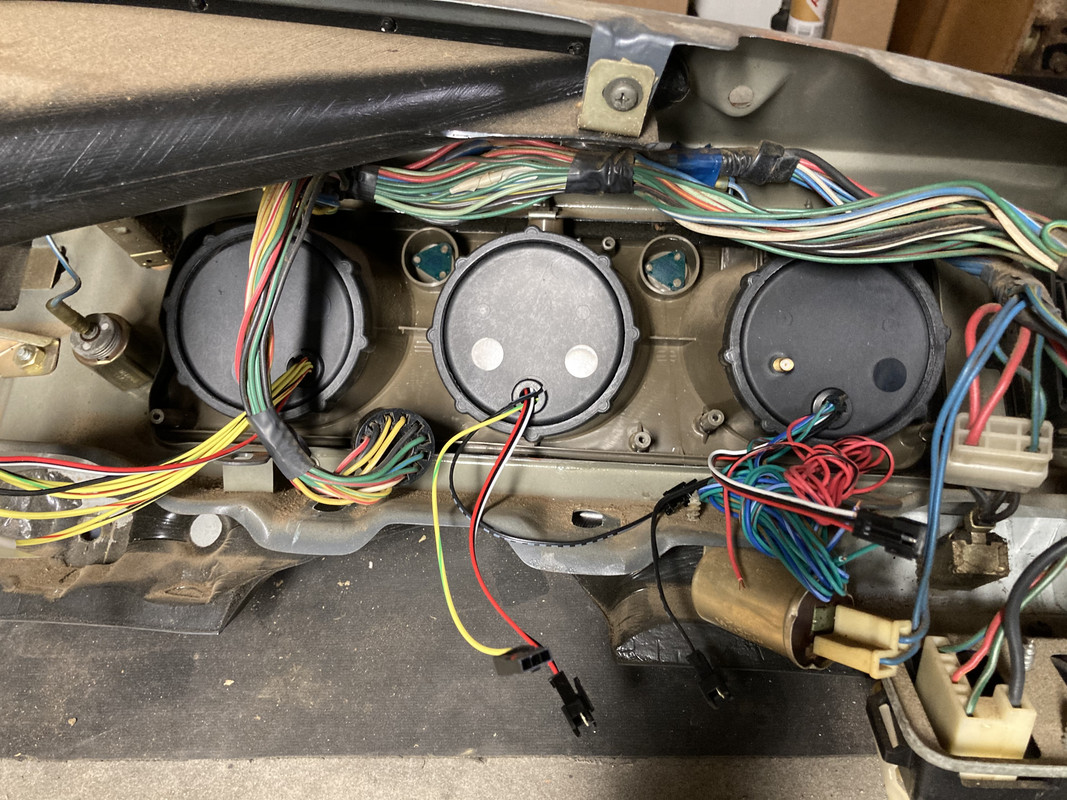
Got some goodies this week!!!!
Pretty much the same setup I have in the Z except for the combo. Speedhuts 3-3/8” gps speedo, tach, and combo. Could not have been easier to install. Literally dropped them in and put the threaded ring on the back, done.

-
6
-
-
2 hours ago, banzai510(hainz) said:
a over charging means the alternator is good. But the regulator is bad or
or a Internat volt reg Alternator with a external volt reg installed msot likely
I keep my old volt regs and install them and see what happens.
Im not a z car guy but I ck all my fuses and connections in case a wire went open (Like a sense line and it trys to over volt) bUt like i said Im really kind of guess on this.
I had Echlin Brand Voltregs from Napa and they were junk. over volt in 2 years
Yeah I have 2 voltage regulators and tried them both, same result. I think this is a rabbit hole I don’t have time to go down so my friend will most likely have to get this looked at by an old timer - Rock Vest.
-
29 minutes ago, mainer311 said:
I’m not sure how much you’re fighting getting that stuff out of the bed, but I’ve heard of a cool trick where you can dump dry ice into floor pans, and it allows you scrape off old sound deadener material.
It works, I used this technique in my Z removing the tar based sound deadener.
-
2
-


LSD options for h190
in Drivetrain
Posted
Me too...I searched really hard several years ago but it seems to be a unicorn.